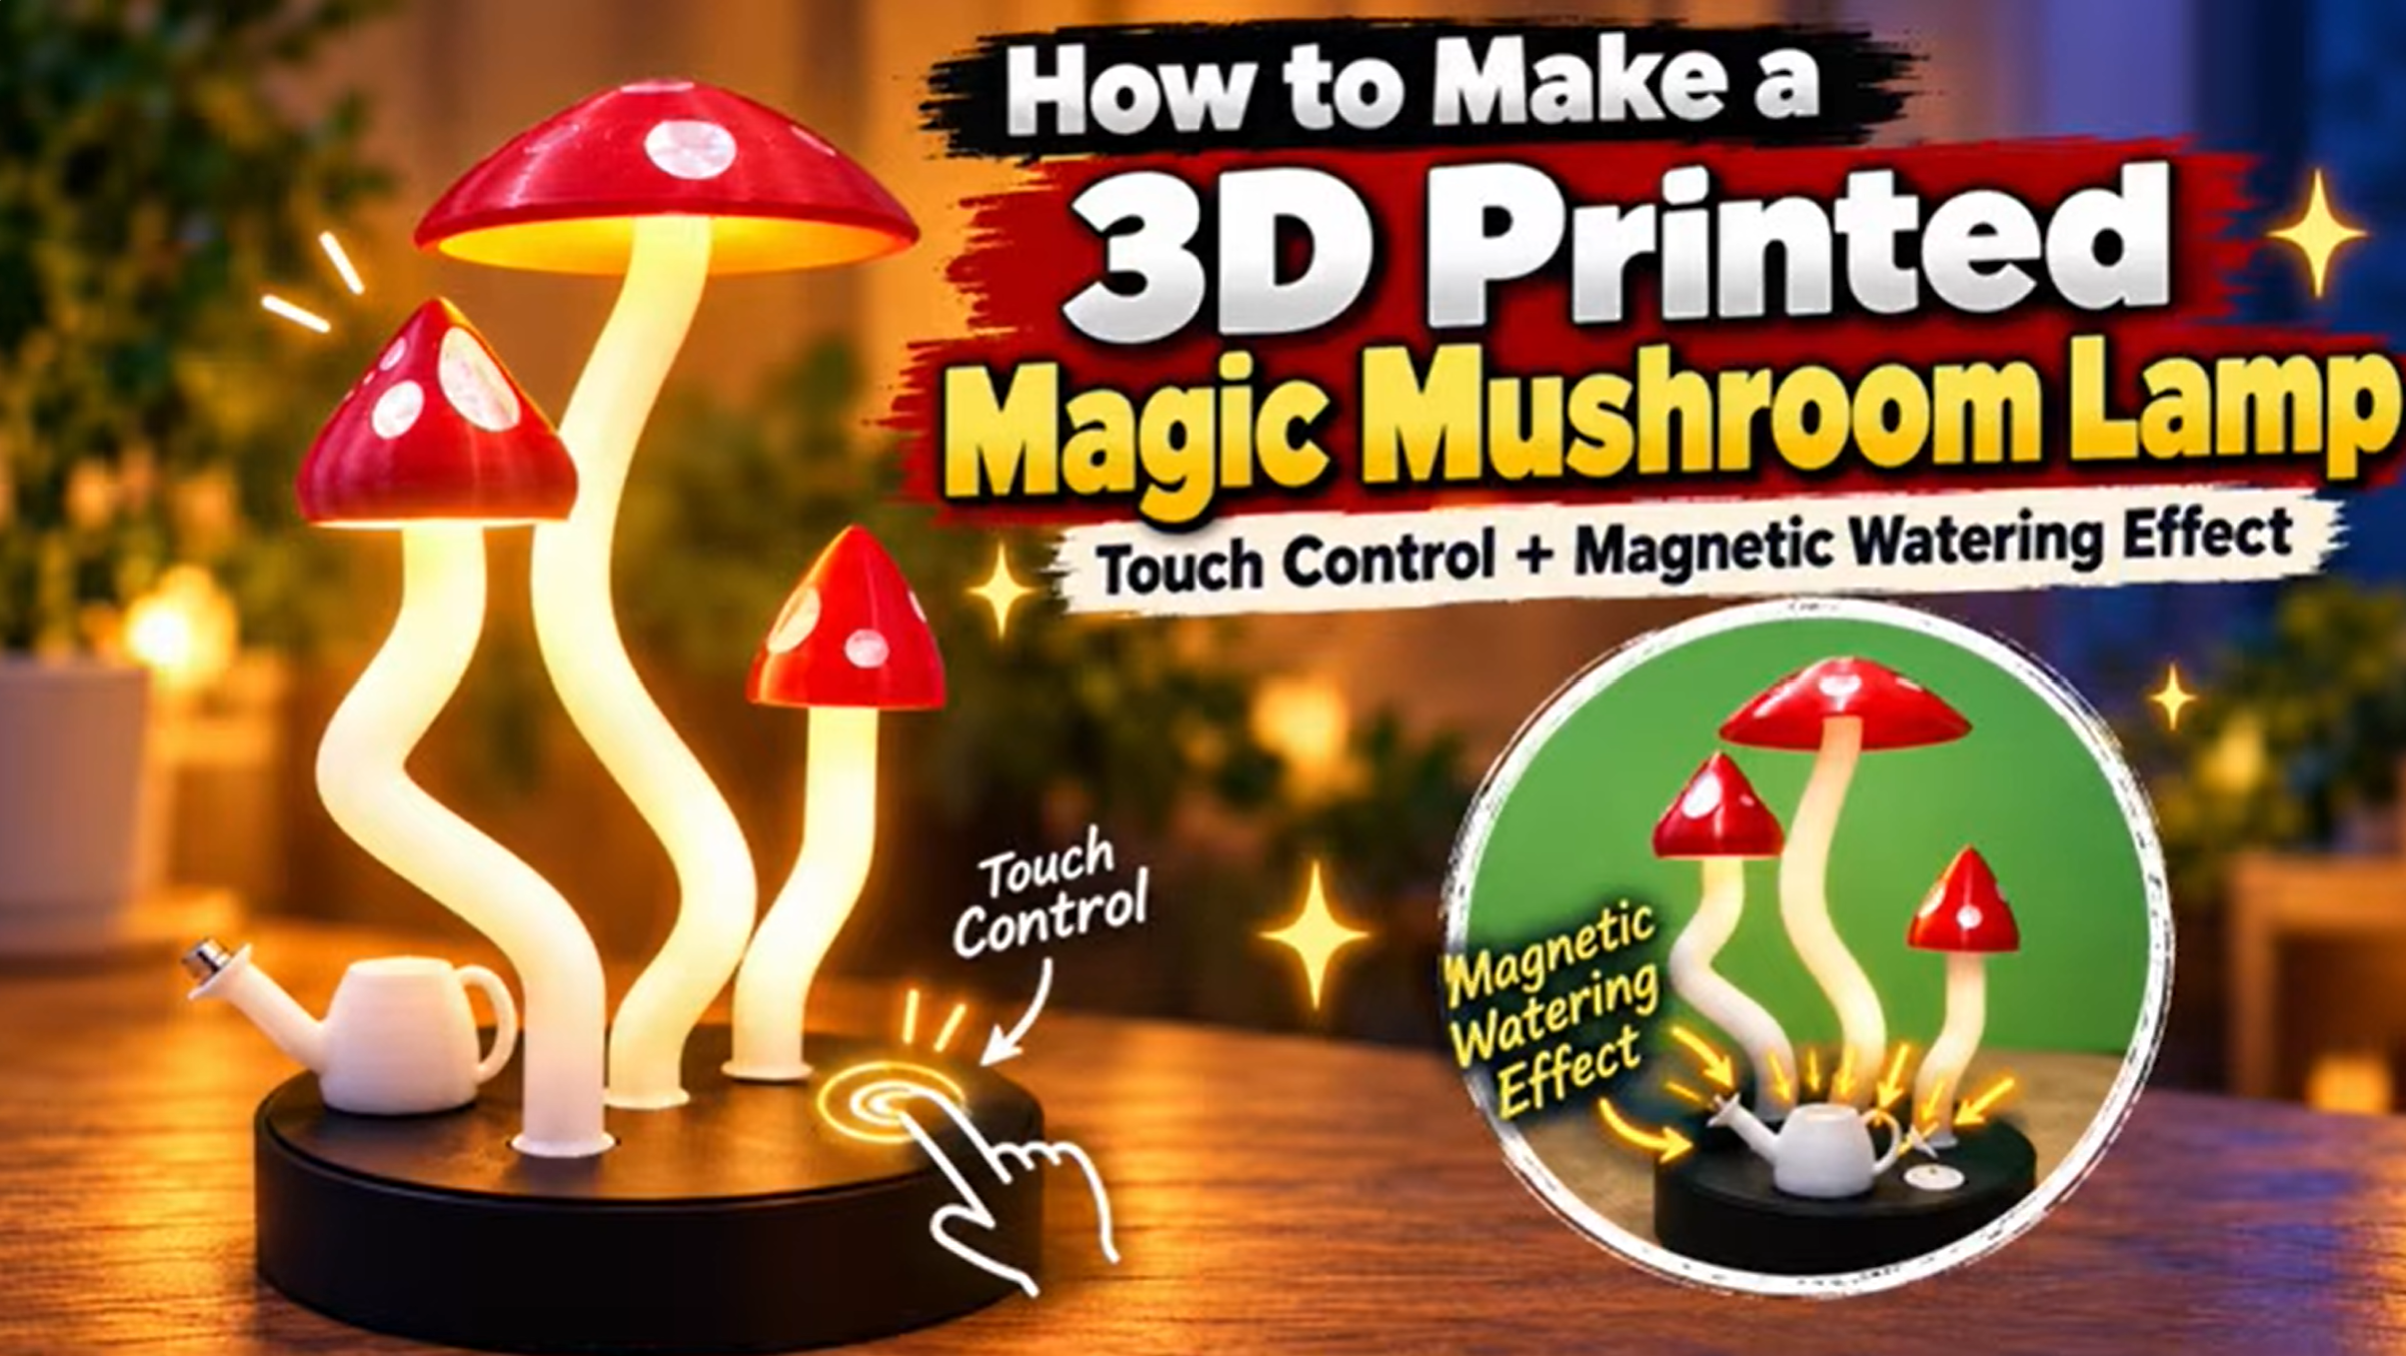
Bring a little magic to your desk with this interactive 3D-printed mushroom lamp featuring colorful RGB lighting, touch control, and a unique magnetic watering animation! 🍄✨
In this DIY project, I’ll show you how to create a beautiful Magic Mushroom Lamp using an ESP32-C3 SuperMini, WS2812B addressable RGB LEDs, a TTP223 capacitive touch sensor, and a Hall effect magnetic sensor.
This isn’t just an ordinary decorative lamp! It responds to your touch, changes colors, creates smooth lighting effects, and even reacts when you bring a miniature watering can close to its base.
The project combines 3D printing, electronics, Arduino programming, and creative lighting effects to create a unique and interactive desk decoration.
Main Features
- Touch ON/OFF Control: Turn the lamp on or off with a single touch.
- 12 Color Options: Switch between multiple fixed colors with a double tap.
- Rainbow Mode: Enjoy continuously changing RGB lighting.
- Breathing Light Effect: Touch and hold to activate a smooth breathing animation.
- Warm White Night Light: Create a relaxing atmosphere with soft ambient lighting.
- Magnetic Watering Effect: Bring the miniature watering can close to the base to activate a special lighting animation.
- Bottom-to-Top Green Animation: The LEDs illuminate progressively upward to simulate watering.
- Reverse Watering Animation: When the watering can is removed, the green light moves downward.
- ESP32-C3 SuperMini Control: A compact microcontroller manages the lighting and sensor interactions.
- Fully 3D-Printed Design: Includes decorative mushrooms, a base, and a miniature watering can.
How Does the Magic Mushroom Lamp Work?
The lamp is controlled by an ESP32-C3 SuperMini, which receives signals from the touch and magnetic sensors and controls the WS2812B addressable LEDs.
Touch Control
The TTP223 capacitive touch sensor allows you to interact with the lamp using simple gestures.
A single touch turns the lamp on or off, while a double tap changes the lighting color. Holding your finger on the sensor activates a smooth breathing-light effect using the selected color.
You can also select a warm white mode for nighttime illumination.
Magnetic Watering Effect
One of the most exciting features is the miniature magnetic watering can.
Small neodymium magnets are hidden inside the watering can, while a Hall effect sensor is installed inside the lamp base.
When you bring the watering can close to the designated area, the sensor detects the magnetic field and activates a green lighting animation.
The LEDs illuminate progressively from the bottom to the top, creating the illusion that the mushrooms are being watered and coming to life.
When the watering can is removed, the animation reverses, and the green light gradually moves downward.
It’s a simple but fascinating interaction that makes the lamp feel alive!
Components You’ll Need
Electronics
- ESP32-C3 SuperMini Development Board
- WS2812B 5V Addressable RGB LED Strip (30 cm)
- TTP223 Capacitive Touch Sensor
- Hall Effect Magnetic Sensor
- 3 × 5 × 2 mm Neodymium Magnets
- 330Ω Resistor
- 5.5 × 2.1 mm DC Power Jack
- 5V Power Adapter
- Connecting Wires
- Heat-Shrink Tubing
3D Printing and Assembly
- 3D-Printed Mushroom Stems and Caps
- 3D-Printed Lamp Base
- 3D-Printed Miniature Watering Can
- White or Translucent Filament for the Mushroom Stems
- Colored Filaments for the Mushroom Caps and Base
- Hot Glue
What You’ll Learn
In this step-by-step tutorial, I’ll show you:
- How to 3D print the mushroom lamp components.
- How to assemble the mushroom stems, caps, and base.
- How to install WS2812B RGB LEDs.
- How to connect the ESP32-C3 SuperMini.
- How to wire the TTP223 touch sensor.
- How to install and configure the Hall effect magnetic sensor.
- How to program different RGB lighting effects.
- How to create the magnetic watering animation.
- How to assemble and test the completed lamp.
Watch the Full Step-by-Step Tutorial
I’ve created a complete YouTube tutorial showing the entire process, including 3D printing, component installation, wiring, ESP32 programming, final assembly, and testing.
Follow along and create your own interactive Magic Mushroom Lamp!
Watch the full tutorial on my YouTube channel: Bambu3Design!
Download the ESP32-C3 Code
Want to build your own interactive mushroom lamp?
The complete ESP32-C3 program used to control the touch sensor, RGB lighting, and magnetic watering animation is available on my website.
Download the ESP32-C3 Code:
Download the 3D Printing Files
The 3D-printable files for the mushroom lamp, base, and miniature watering can are available on my MakerWorld page.
Download the 3D Printing Files:
https://makerworld.com/models/3386114
Create Your Own Magical Mushroom Lamp!
This project is perfect for anyone who enjoys creative 3D printing, Arduino electronics, RGB lighting, and interactive DIY projects.
Experiment with different mushroom colors, lighting effects, and decorative combinations to make your own unique version.
The Magic Mushroom Lamp makes a wonderful desk decoration, night light, or personalized handmade gift.
Explore more ESP32 projects, Arduino tutorials, DIY electronics, and 3D printing designs at Bambu3Design!
If you build your own Magic Mushroom Lamp, I’d love to see your creation!
Don’t forget to subscribe to my YouTube channel for more exciting projects and step-by-step tutorials.