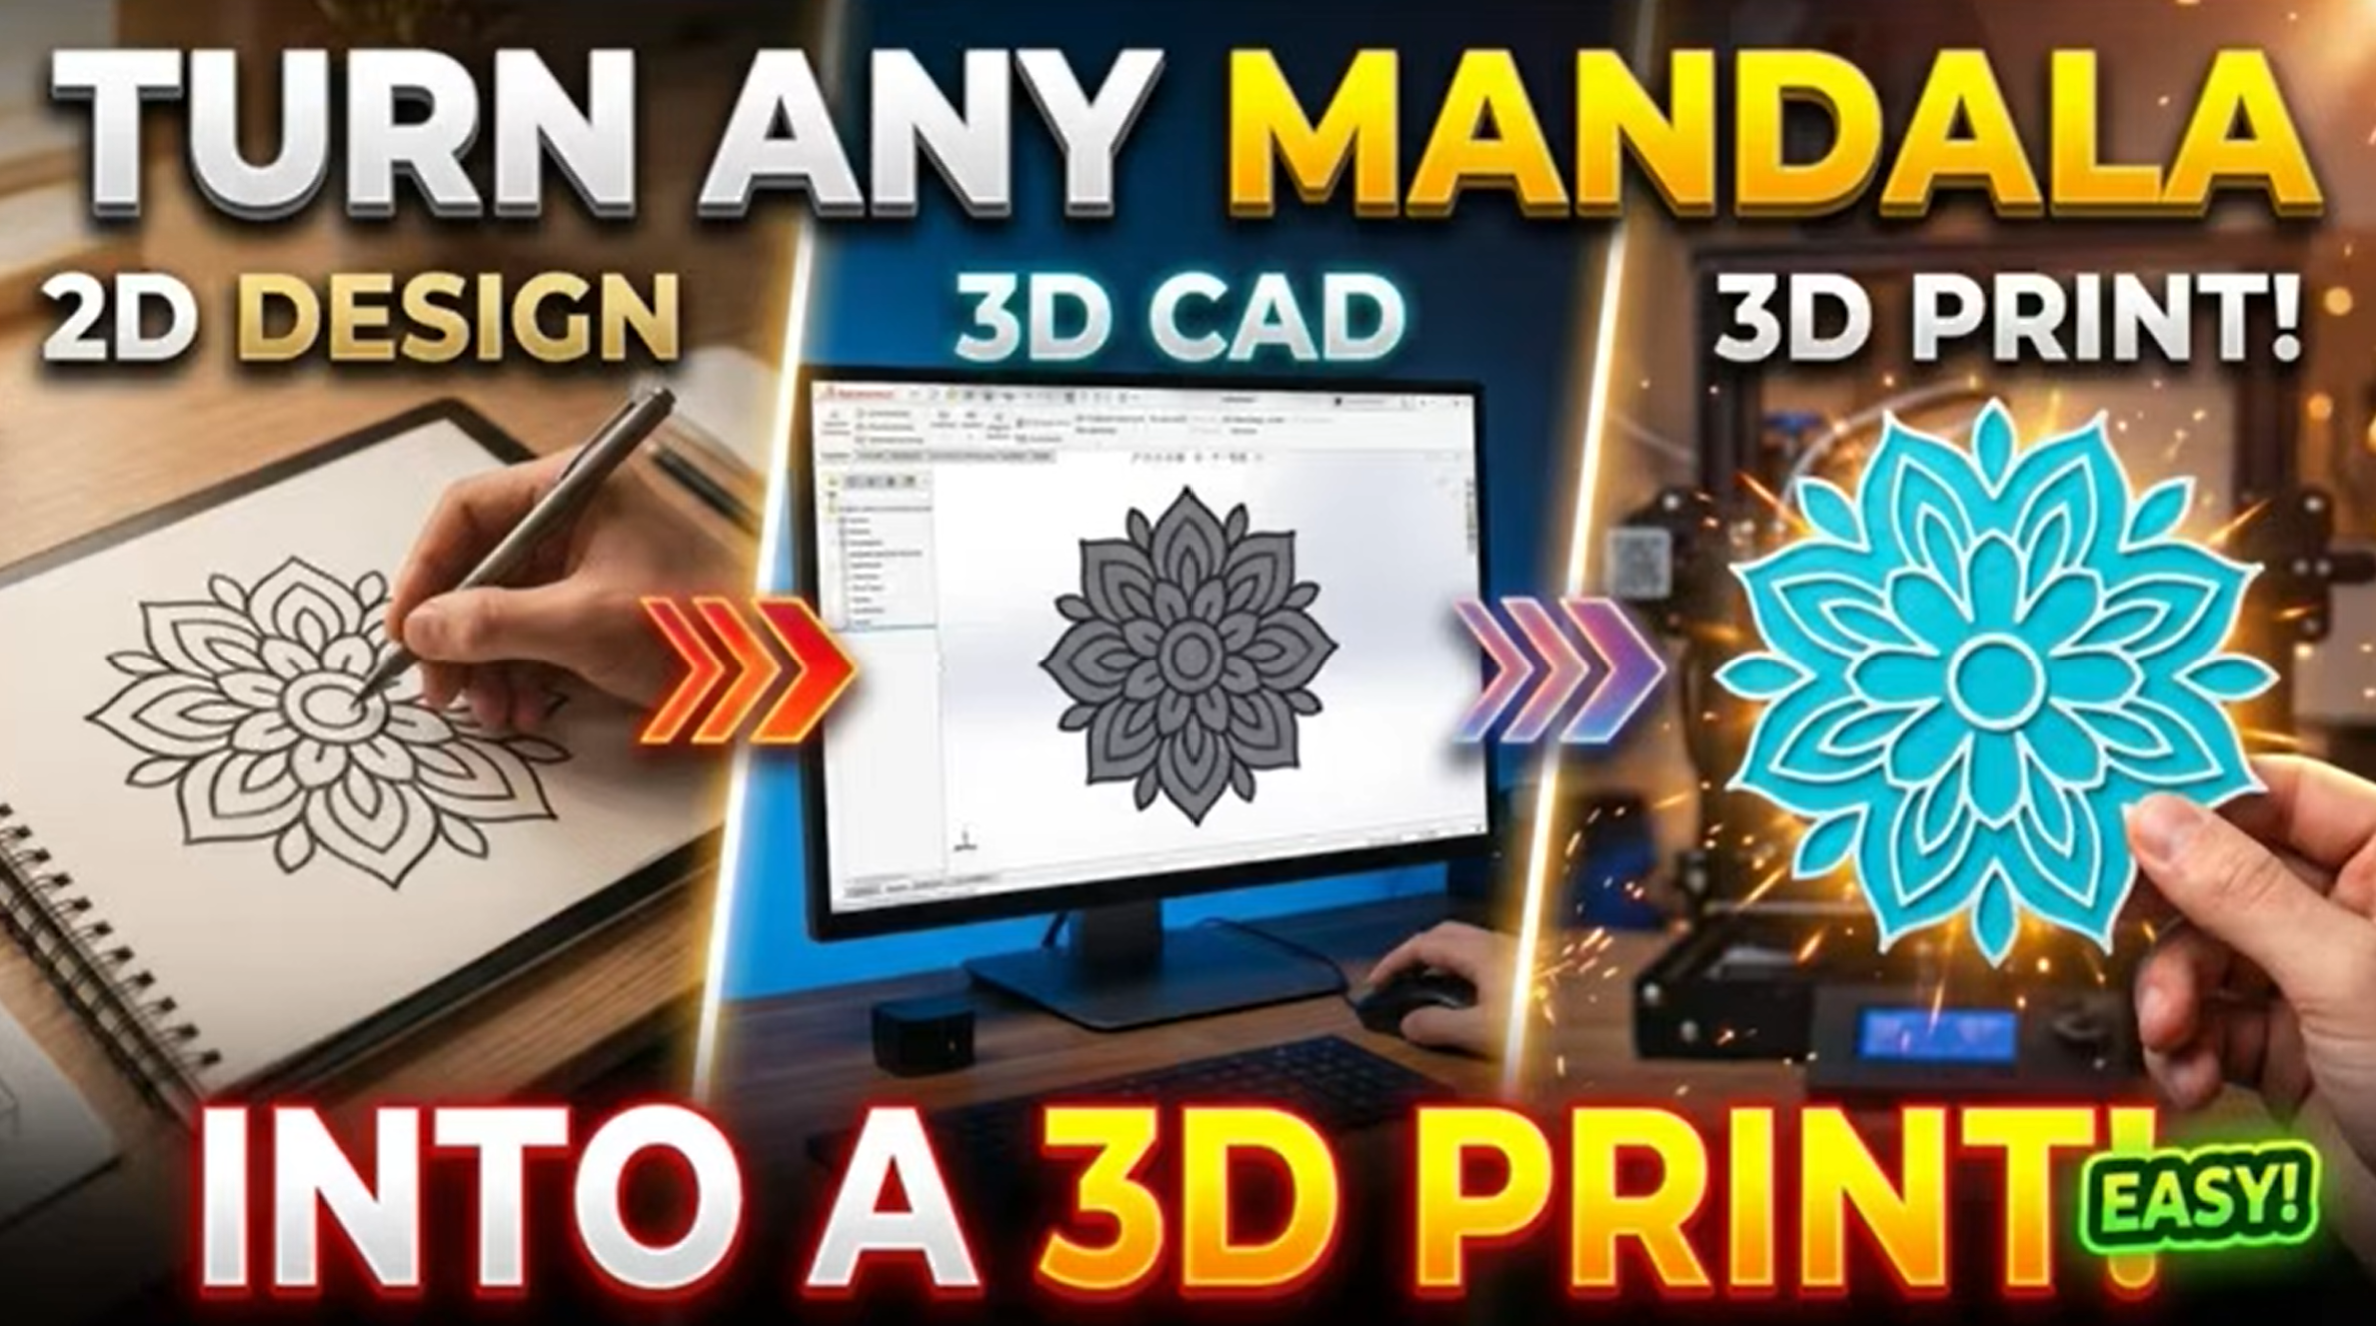
Learn how to transform beautiful mandala artwork into a real 3D-printable model using CorelDRAW, SOLIDWORKS, and Bambu Studio!
In this step-by-step tutorial, I’ll show you an easy and efficient workflow for converting a mandala image into a detailed 3D-printable design.
A special focus of this project is the Symmetry Tool in CorelDRAW, which makes it much faster and easier to create complex mandala patterns. Instead of drawing the entire design manually, you only need to trace one section, and CorelDRAW automatically repeats it around the center.
After preparing the mandala in CorelDRAW, we’ll export it as a DXF file, import it into SOLIDWORKS, add thickness to create a 3D model, save it as an STL file, and finally prepare it for printing in Bambu Studio.
This method is a simple and powerful way to create symmetrical, decorative, and highly detailed 3D prints.
Complete Workflow
Mandala Image → CorelDRAW → DXF → SOLIDWORKS → STL → Bambu Studio → 3D Print
What You’ll Learn
In this tutorial, you’ll discover:
- How to import a mandala reference image into CorelDRAW.
- How to use the Symmetry Tool to simplify mandala creation.
- How to choose the correct number of repeated sections.
- How to accurately position the symmetry center.
- How to trace one section of the mandala using the B-Spline Tool.
- How CorelDRAW automatically repeats the section around the center.
- How to refine and adjust curves for a cleaner result.
- How to fix overlapping or unwanted lines.
- How to choose a suitable outline thickness for 3D printing.
- How to convert outlines into objects.
- How to weld shapes together into one printable design.
- How to export the final vector as a DXF file.
- How to import the design into SOLIDWORKS.
- How to add thickness and create a solid 3D model.
- How to export the file as STL.
- How to prepare the model in Bambu Studio for 3D printing.
Why Use the CorelDRAW Symmetry Tool?
Mandala designs often contain many repeated shapes arranged around a center point.
Drawing every section manually can take a long time and make it difficult to maintain perfect symmetry.
The Symmetry Tool in CorelDRAW solves this problem by automatically repeating your drawing around a chosen center point.
This means you only need to design one section, and the software generates the repeated pattern for you, saving time and improving accuracy.
This makes the workflow ideal for creating mandalas, radial ornaments, decorative patterns, and other symmetrical designs.
Step 1: Import the Mandala Reference Image
Start by choosing a suitable mandala image.
A good mandala reference should have:
- Clear visible shapes
- Strong contrast
- A well-defined center
- Repeated radial sections
- Clean decorative details
Import the image into CorelDRAW and use it as a reference for tracing.
Step 2: Create the Symmetry Setup in CorelDRAW
Next, create a new symmetry setup.
Choose the number of repeated sections based on the structure of the mandala design.
Then carefully position the symmetry center so it aligns with the center of the pattern.
This step is important because accurate symmetry placement makes the entire design cleaner and more balanced.
Step 3: Trace One Section Using the B-Spline Tool
Once the symmetry is set, trace only one section of the mandala using the B-Spline Tool.
As you draw, CorelDRAW automatically repeats your work around the center.
This allows you to build detailed and complex mandala patterns much more quickly than drawing each section separately.
Step 4: Clean and Prepare the Design
After tracing, refine the design by:
- Adjusting the curves
- Fixing line overlaps
- Removing unnecessary segments
- Setting an outline thickness suitable for 3D printing
- Converting outlines to objects
- Welding the shapes together
This creates a clean and continuous design that is ready for export.
Step 5: Export as DXF and Import into SOLIDWORKS
When the mandala vector is ready, save it as a DXF file.
Then import the DXF into SOLIDWORKS.
Inside SOLIDWORKS, you can:
- Check the sketch geometry
- Correct small issues if needed
- Use Extruded Boss/Base to add thickness
- Turn the flat design into a 3D printable solid model
Once the model is complete, save it as an STL file.
Step 6: Prepare the STL in Bambu Studio
Import the STL file into Bambu Studio to prepare it for printing.
At this stage, you can adjust:
- Model size
- Layer height
- Wall settings
- Ironing
- Print orientation
- Other slicing settings
Then slice the model and send it to your 3D printer.
What Can You Make with This Method?
This technique can be used for many different decorative and creative projects, such as:
- Mandala wall art
- Decorative ornaments
- Coasters
- Hanging decorations
- Framed decorative pieces
- Personalized gifts
- 3D printed mandala signs
- Other symmetrical 2D-to-3D designs
Watch the Full Step-by-Step Tutorial
I’ve created a full video tutorial showing the entire process, from setting up the mandala symmetry in CorelDRAW to preparing the final STL in Bambu Studio.
Follow along and learn how to turn intricate mandala artwork into a real 3D print!
Watch the full tutorial on my YouTube channel: Bambu3Design!
Download the 3D Model
Want to try this project yourself?
You can download the finished file from my MakerWorld page using the link below.
Download the 3D Model:
Start Creating Your Own 3D Mandala Designs!
This workflow is a great way to combine artistic design, vector drawing, CAD modelling, and 3D printing.
Once you understand the process, you can apply the same method to many different mandala styles and symmetrical artworks.
Explore more CorelDRAW tutorials, SOLIDWORKS projects, and 3D printing ideas at Bambu3Design!
If you enjoyed this tutorial, don’t forget to subscribe to my YouTube channel, share your creations, and explore more step-by-step DIY projects.
Happy Making!