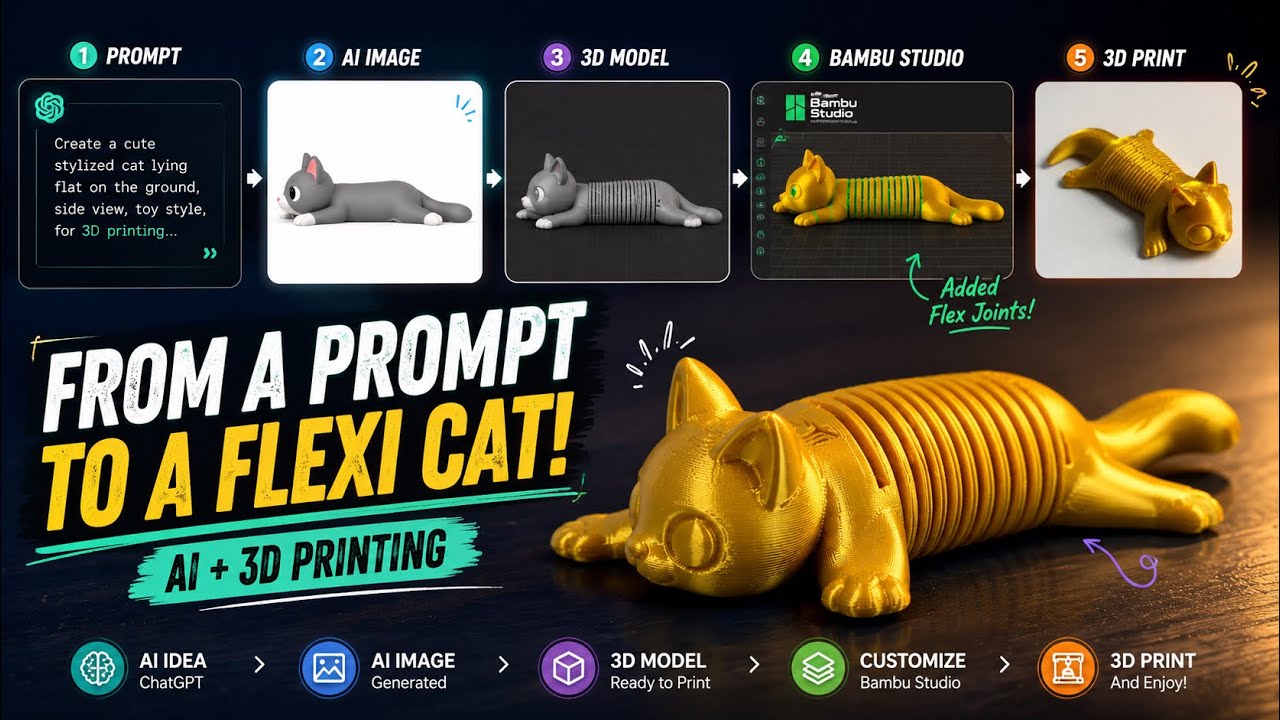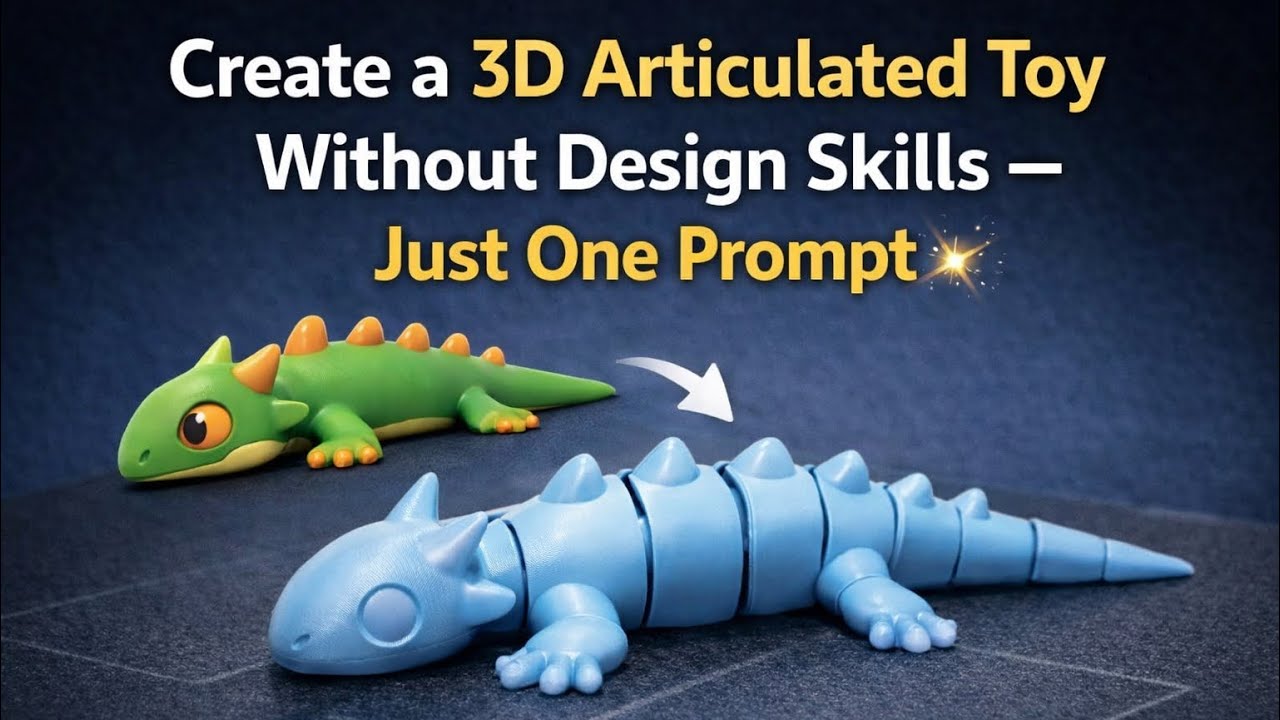
In this video, I show you how to create a fully articulated (flexi) 3D toy using just one image and one prompt — no CAD or 3D design skills required.
You’ll learn how to:
• Turn a simple image into a 3D model using MakerWorld / MakerLab
• Convert the model into a flexible articulated toy
• Add and adjust flexi joints
• Prepare the model in Bambu Studioa
• Slice and send it directly to your 3D printer
All you need is an image, a few clicks, and Bambu Studio.
If you want the STL or the flexi joint part used in this video, leave a comment or message me and I’ll send you the link.
🔧 Tools used:
• MakerWorld (MakerLab – Image to 3D)
• Bambu Studio
If you want to make this yourself, the 3D model file is available to download from the link below.
https://makerworld.com/models/2265878?appSharePlatform=copy
——-
This is the prompt used in this video:
Create a high-quality 3D render in a Fortnite-style chunky toy aesthetic. Use the exact same pose, proportions, body alignment, and camera angle as the reference: a clean left-side orthographic profile with zero perspective distortion. The creature lies completely flat on its belly with its head resting fully on the ground, neck extended forward, body forming a perfectly straight horizontal line from nose to tail. All four legs splayed outward in a relaxed, natural position. The front legs angle slightly forward and outward, and the back legs angle slightly backward and outward. Maintain perfect left-right symmetry, smooth rounded shapes, simple soft lighting, and a neutral background. Now recreate this same fixed pose and structure as a different stylized creature while preserving the exact proportions and layout.