How to Create 3D Models for Printing: From Concept to Print
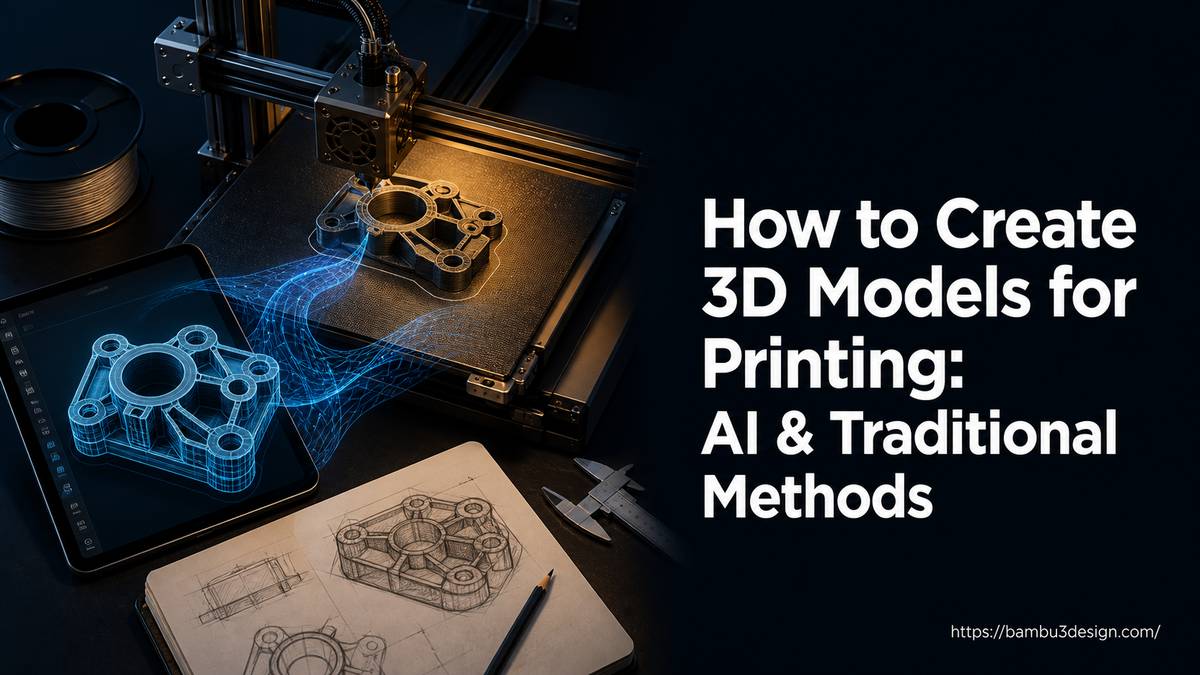
Turning a digital idea into a tangible 3D printed object is a core aspect of the maker world. However, the journey from concept to a perfectly printed model often involves intricate steps, especially when it comes to creating the 3D model itself. Historically, this process relied heavily on specialized Computer-Aided Design (CAD) software, demanding significant time and skill. Today, advancements in Artificial Intelligence (AI) are revolutionizing how we create 3D models for printing, offering faster and more accessible alternatives.
This comprehensive guide explores both traditional CAD workflows and the emerging power of AI-powered 3D model generation, helping you navigate the entire process from conceptualization to a flawless physical print.
Understanding 3D Models for Printability
Before diving into creation methods, it’s crucial to understand what makes a 3D model \”printable.\” Unlike models for rendering or animation, 3D printing demands specific structural integrity:
- Watertight Mesh: The model’s surface must be a continuous, enclosed volume without any holes or gaps. A non-watertight mesh cannot be sliced correctly, leading to printing errors.
- Sufficient Wall Thickness: Every part of the model needs a minimum wall thickness to withstand the printing process and have structural strength. Thin walls are prone to breaking, warping, or simply failing to print.
- Correct Scale and Dimensions: The model must be designed to the intended real-world size, ensuring parts fit together or the object meets its functional requirements.
- Simplified Details: While fine details are desirable, overly complex or tiny features can be challenging for 3D printers to reproduce accurately, potentially leading to failed prints or messy results.
Method 1: Traditional CAD Modeling
Traditional 3D modeling involves using specialized software to design objects from scratch. This method offers unparalleled control and precision, making it ideal for functional parts, complex assemblies, and engineering applications.
1. Conceptualize Your Design
Start with a clear idea. Sketching your design on paper helps define its form, function, and critical dimensions. Consider the final application, material choice, and the capabilities of your 3D printer early in this stage.
2. Choose the Right 3D Modeling Software
Selecting software depends on your skill level, project complexity, and budget. Here’s a breakdown of popular options:
| Software | Ease of Use | Skill Level | Capabilities | Cost | Ideal For |
| :———- | :—————– | :———————– | :—————————————————- | :———————————- | :—————————————– |
| TinkerCAD | Very Easy | Beginner | Basic 3D modeling, simple designs, quick prototyping | Free | Hobbyists, educators, and beginners |
| Fusion 360| Moderate | Beginner to Intermediate | CAD modeling, product design, prototyping, simulation | Free for personal use; Subscription for professionals | Product designers and engineers |
| Blender | Moderate to Advanced | Intermediate to Advanced | Comprehensive 3D modeling, sculpting, animation, rendering, VFX | Free, Open Source | Artists, animators, and game developers |
| SolidWorks| Moderate | Advanced | Professional-grade CAD, engineering, simulation, complex assemblies | Paid (Subscription-based) | Engineers, industrial designers, and professionals |
3. Core Design Principles for Printability
When creating your 3D printing model in traditional software, keep these principles in mind:
- Design with a Flat Base: A stable, flat surface on your model simplifies printing, provides better adhesion to the build plate, and often reduces the need for extensive support structures.
- Modular Parts: For highly complex or large designs, break them into smaller, interlocking components. This makes printing easier, reduces failure rates, and allows for printing objects larger than your build volume.
- Maximize Material Use (Strategically): While not always possible, designing with efficient material use can reduce waste and printing time. Consider hollowing parts or using infill wisely during the slicing stage.
- Balance Detail vs. Printability: Avoid overly intricate or tiny features that your printer cannot reproduce accurately. Simplify complex geometry where possible without sacrificing the design’s intent. Understand your printer’s nozzle size or resin’s resolution limits.
Method 2: AI-Powered 3D Model Generation
AI tools are transforming 3D model creation by generating printable assets from simple text descriptions or 2D images. This approach significantly shortens creation cycles and democratizes access to 3D modeling.
What is AI 3D Model Generation?
AI 3D model generators, like Tripo AI and Meshy AI, use advanced algorithms to interpret human-language prompts (text-to-3D) or photographic inputs (image-to-3D) and convert them into three-dimensional models. These tools aim to output models that are already optimized for downstream uses, including 3D printing.
How AI-Powered Generators Work
- Enter Prompts (Text-to-3D): Start by describing your desired object in natural language (e.g., \”a retro car with a spoiler,\” \”an ancient sword\”). The more descriptive your prompt, the better the AI can interpret your vision.
- Generate Image & 3D Model: The AI first generates a reference image based on your text prompt. Once confirmed, it converts this 2D image into a high-quality 3D model. For image-to-3D, you upload a 2D image directly.
- (Optional) Enhance & Refine: While many AI models are print-ready, some platforms allow for further enhancement within the tool, such as applying textures, splitting parts, or minor structural adjustments.
- Download: Export your 3D model in common formats like STL, OBJ, FBX, or 3MF, ready for slicing.
Benefits of AI for Creating 3D Models for Printing
- Speed: Create complex models in seconds or minutes, a fraction of the time required for manual modeling.
- Accessibility: Lower the barrier to entry for beginners or those without extensive CAD experience.
- Print-Ready Output: Many AI tools focus on generating watertight meshes with optimized topology and sufficient wall thickness from the outset, reducing post-generation repair work.
- High-Fidelity Detail: Advanced AI models can preserve intricate details and apply realistic textures, even from simple prompts.
- Cost Reduction: By significantly cutting design time, AI tools can lead to overall project cost savings.
Tripo AI, for instance, emphasizes generating \”pixel-accurate shapes true to your vision,\” with \”sharp geometry, structured with clarity,\” and \”AI-powered texturing, rich in detail,\” providing models with clean, organized meshes that are easy to edit and export for manufacturing.
Preparing and Optimizing Your 3D Model for Printing
Whether you’ve modeled from scratch or generated with AI, optimization is a crucial step to ensure a successful print. Many AI tools integrate some of these features, but manual checks are always recommended.
1. Mesh Repair
- Addressing Non-Watertight Models: Use tools within your modeling software or dedicated mesh repair utilities (often integrated into slicers) to identify and fix holes, inverted normals, or self-intersecting geometry. A watertight model is fundamental for slicing.
- Simplifying Complex Details: Reduce the polygon count in areas where extreme detail isn’t necessary. This can make the model easier for your slicer and printer to handle without noticeable loss of quality.
2. Wall Thickness Adjustment
- Ensuring Structural Strength: Use analysis tools in CAD software or specialized repair utilities to check for walls below the minimum printable thickness (typically 0.8mm for FDM, though consult your printer’s specifications). Adjust by thickening surfaces or adding internal bracing.
3. Hollowing (Optional, for Resin/Large FDM Prints)
- Reducing Material and Time: For resin prints or very large FDM objects, hollowing the model can save significant material and printing time. Remember to add drain holes to resin prints to prevent uncured resin from being trapped inside.
4. Support Generation Strategy
- Overhangs: Identify areas of your model that require support structures to print successfully. Slicer software can automatically generate supports, but understanding your model’s geometry allows for strategic placement, minimizing material usage and post-processing.
5. Remeshing
- Improving Topology: In some cases, especially with models generated through sculpting or photogrammetry, remeshing can create a more uniform and cleaner mesh topology, which can improve slicing and overall print quality.
Exporting to 3D Printer-Friendly File Formats
Once your model is optimized, export it in a format compatible with 3D printing software. The most common formats are:
- STL (Stereolithography): The industry standard, representing the surface of a 3D object as a collection of triangular facets. It’s universally supported by slicers.
- OBJ (Object): A more versatile format that can store color and texture information, along with geometry.
- 3MF (3D Manufacturing Format): An open-source format designed to be more comprehensive than STL, supporting color, textures, material properties, and multiple objects in a single file.
- FBX (Filmbox): Primarily used in animation and gaming, but some advanced workflows may use it for 3D printing due to its ability to store complex data.
For most FDM and resin printing, STL remains the go-to choice due to its simplicity and broad compatibility.
Slicing Your Model for Printing
Slicing software is the intermediary between your 3D model and your printer. Programs like Bambu Studio, OrcaSlicer, Cura, or PrusaSlicer perform several critical functions:
- Layer Generation: They slice your 3D model into hundreds or thousands of horizontal layers.
- Toolpath Calculation: They determine the exact path your printer’s nozzle or laser will follow for each layer.
- G-code Creation: They convert all this information into G-code, a series of commands that your 3D printer understands and executes.
- Print Settings: This is where you configure crucial parameters like layer height, print speed, infill density, support structures, temperature, and retraction settings.
Careful configuration of slicer settings is paramount for achieving high-quality prints.
Common Mistakes to Avoid When Creating 3D Models for Printing
Avoiding these common pitfalls can save you time, material, and frustration:
- Wrong Scale: Always double-check your model’s dimensions in your design software to ensure it matches the desired physical size. Incorrect scaling is a frequent cause of ill-fitting parts.
- Thin Walls: Design with adequate wall thickness from the outset. Models with walls too thin for the chosen printing method will either fail to print or result in brittle, fragile objects.
- Non-Watertight Models: Ensure your mesh is completely enclosed. Holes or gaps will prevent the slicer from correctly generating toolpaths, leading to errors.
- Overcomplicated Design Details: While 3D printers are precise, extremely fine or intricate details can be challenging. Simplify designs where possible or choose a printing technology (e.g., resin printing) better suited for high resolution.
- Ignoring 3D Printer Limitations: Every printer has size, material, and resolution constraints. Designing outside these limits will lead to print failures or impossible prints.
Expert Tips for Generating Better 3D Models for 3D Printing
To consistently produce high-quality 3D prints, consider these expert tips:
- Start with Clear Objectives: Before designing, clearly define the model’s purpose, functional requirements, and desired aesthetics. This guides design choices and helps avoid unnecessary complexity.
- Iterate and Test: For functional prototypes or complex assemblies, design in stages. Print smaller test pieces or critical connection points to verify dimensions and fit before printing the entire object.
- Understand Material Properties: Different filaments (PLA, PETG, ABS, ASA, TPU, Nylon) and resins have unique characteristics (strength, flexibility, heat resistance, shrinkage). Design your model with the chosen material’s properties in mind.
- Consider Post-Processing: Think about how you’ll finish the print (sanding, painting, assembly) during the design phase. Smooth surfaces are easier to finish, and modular designs simplify painting.
Conclusion
Creating 3D models for printing is a blend of artistry and engineering. Whether you opt for the detailed control of traditional CAD software or leverage the speed and efficiency of AI-powered generators like Tripo AI, understanding the principles of printability and optimization is key to success. By following a structured workflow—from conceptualizing and designing to optimizing, exporting, and slicing—you can effectively transform your digital visions into high-quality physical objects. The rapid evolution of AI tools means that bringing your ideas to life through 3D printing is more accessible and efficient than ever before.