Introduction
Keeping filament dry is one of the easiest ways to improve 3D print quality. Even if you dry your filament before printing, it can quickly absorb moisture from the surrounding air if stored incorrectly.
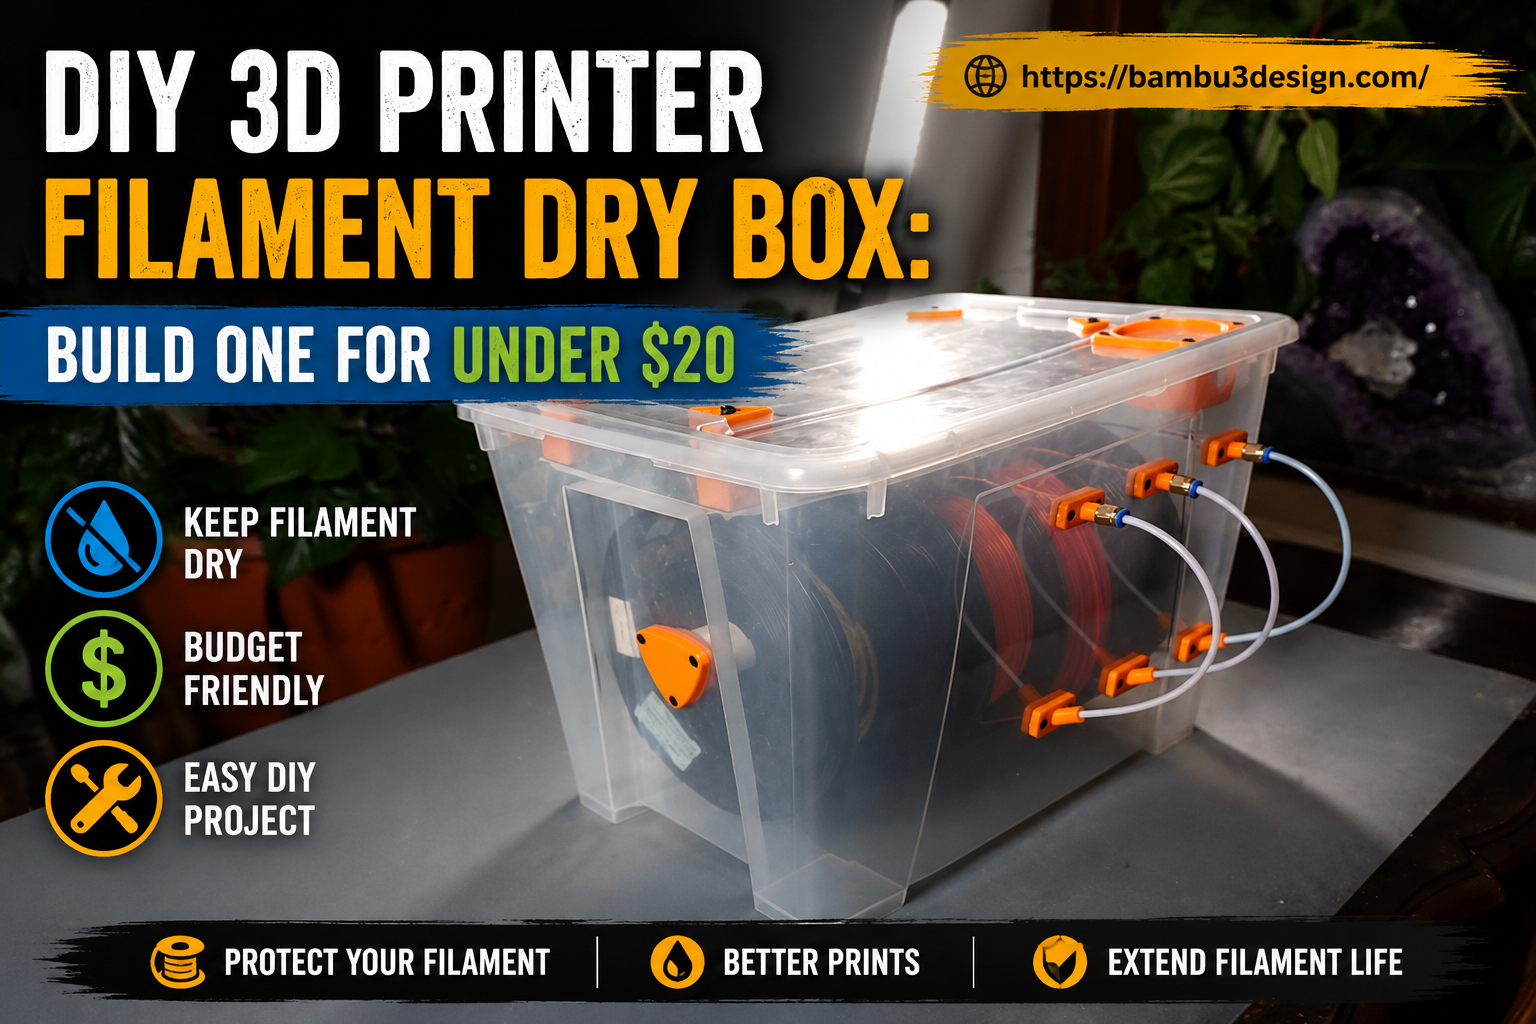
Fortunately, you don’t need to spend hundreds of dollars on expensive commercial dry boxes. With a few inexpensive materials, you can build your own filament dry box that keeps your filament dry for months.
In this guide, we’ll show you everything you need to know about building an affordable DIY filament dry box.
What Is a Filament Dry Box?
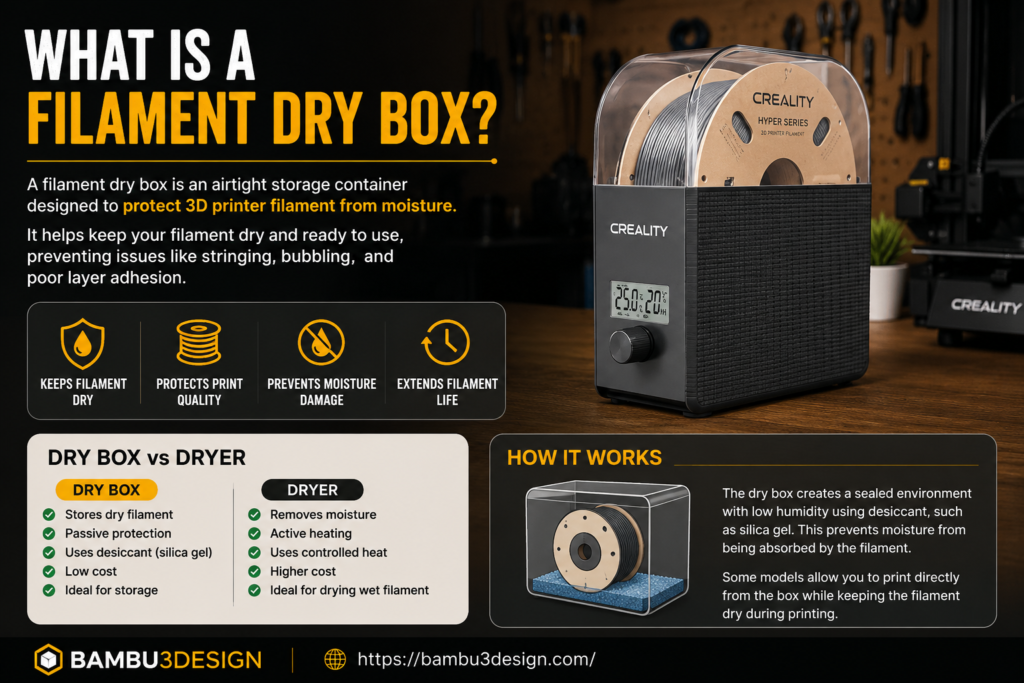
A filament dry box is an airtight storage container designed to protect filament from humidity.
Unlike an active filament dryer, a dry box does not remove large amounts of moisture from already wet filament. Instead, it keeps dry filament dry until you’re ready to print.
Think of it as long-term storage rather than a drying machine.
Dry Box vs Filament Dryer
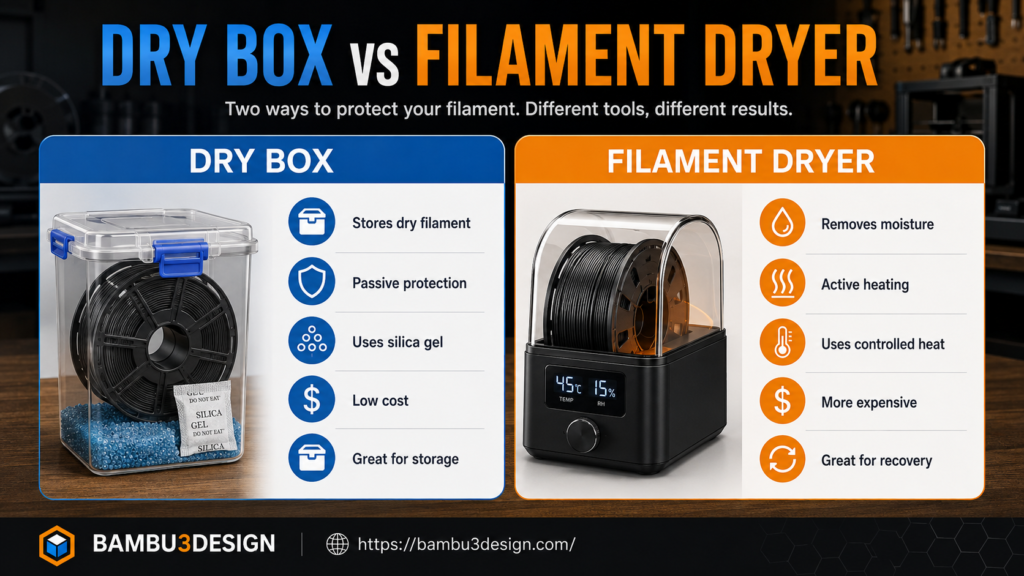
The best solution is to dry filament first, then store it inside a dry box.
Why Build Your Own Dry Box?
Building your own dry box offers several advantages:
- Much cheaper than commercial products
- Custom size for your workspace
- Can store multiple spools
- Easy to repair or upgrade
- Can feed filament directly into the printer
Most DIY dry boxes cost between $15–30, depending on the container and accessories you choose.
Things to Consider Before Building
Before buying materials, think about your needs.
Storage Capacity
Do you need space for:
- One spool?
- Two spools?
- Four or more spools?
Larger containers can store several filaments while maintaining low humidity.
Filament Types
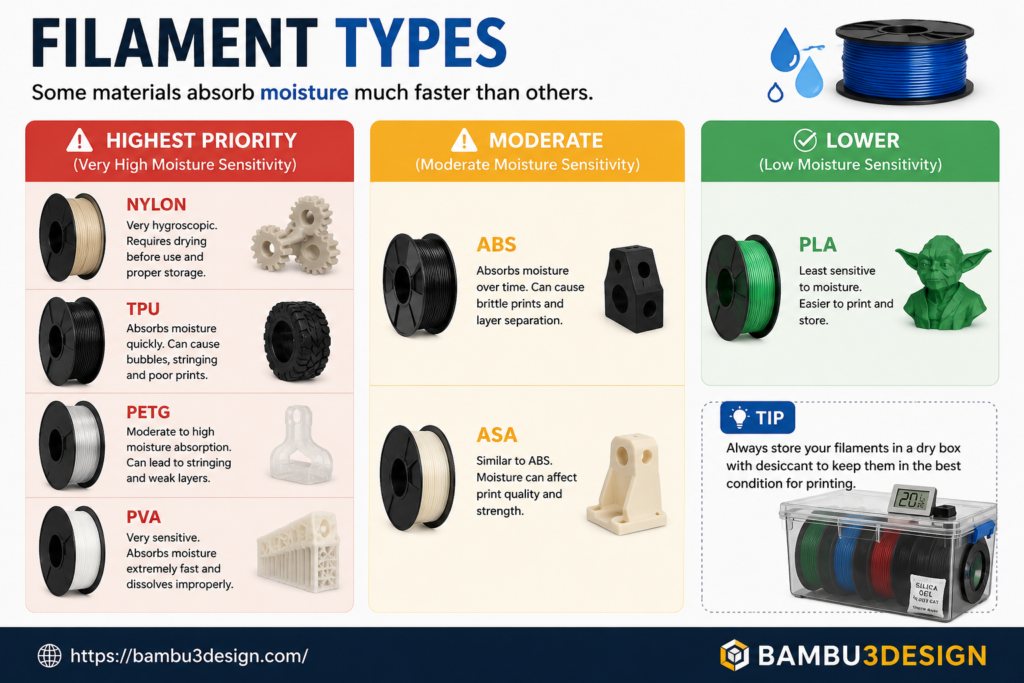
Some materials absorb moisture much faster than others.
Highest priority:
- Nylon
- TPU
- PETG
- PVA
Moderate:
- ABS
- ASA
Lower:
- PLA
Print Directly from the Box?
Many makers prefer printing without removing the filament from the container.
To do this you’ll need:
- PTFE tube
- Pneumatic fitting
- Roller system
This keeps the filament dry during long prints.
Materials You’ll Need
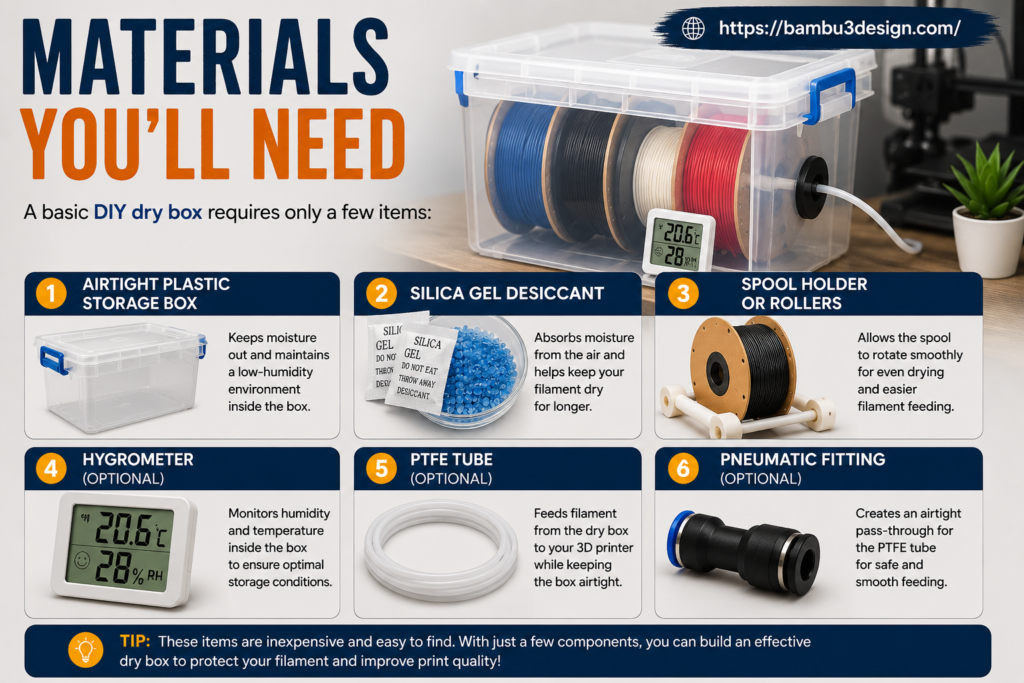
A basic DIY dry box requires only a few items:
- Airtight plastic storage box
- Silica gel desiccant
- Spool holder or rollers
- Hygrometer (optional)
- PTFE tube (optional)
- Pneumatic fitting (optional)
Optional Upgrades
You can improve your dry box by adding:
- Digital humidity meter
- Temperature sensor
- Ball-bearing spool rollers
- Vacuum valve
- Multiple filament outlets
- Printable spool guides
How to Build a Simple Dry Box
Step 1
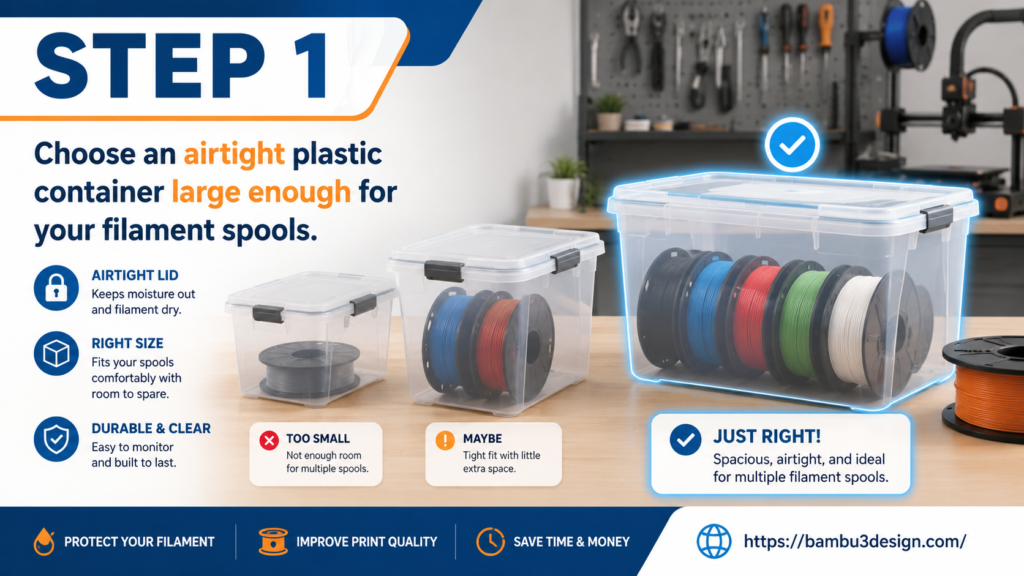
Choose an airtight plastic container large enough for your filament spools.
Step 2
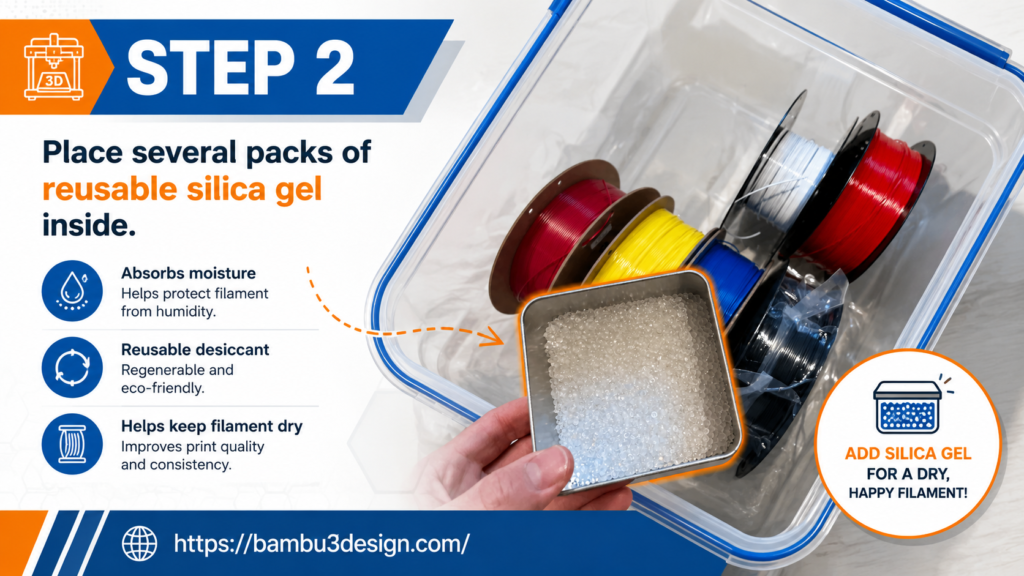
Place several packs of reusable silica gel inside.
Step 3
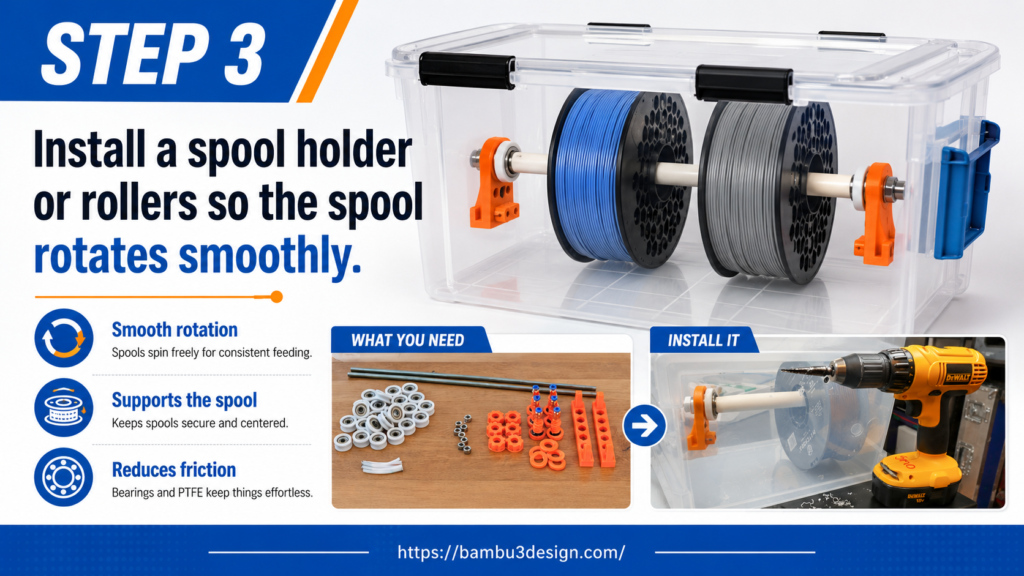
Install a spool holder or rollers so the spool rotates smoothly.
Step 4
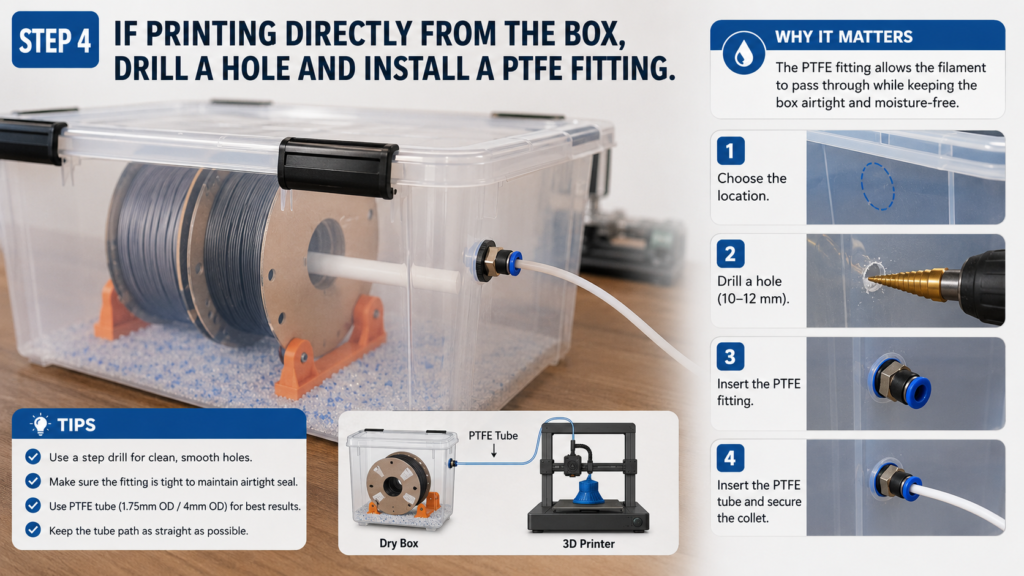
If printing directly from the box, drill a hole and install a PTFE fitting.
Step 5
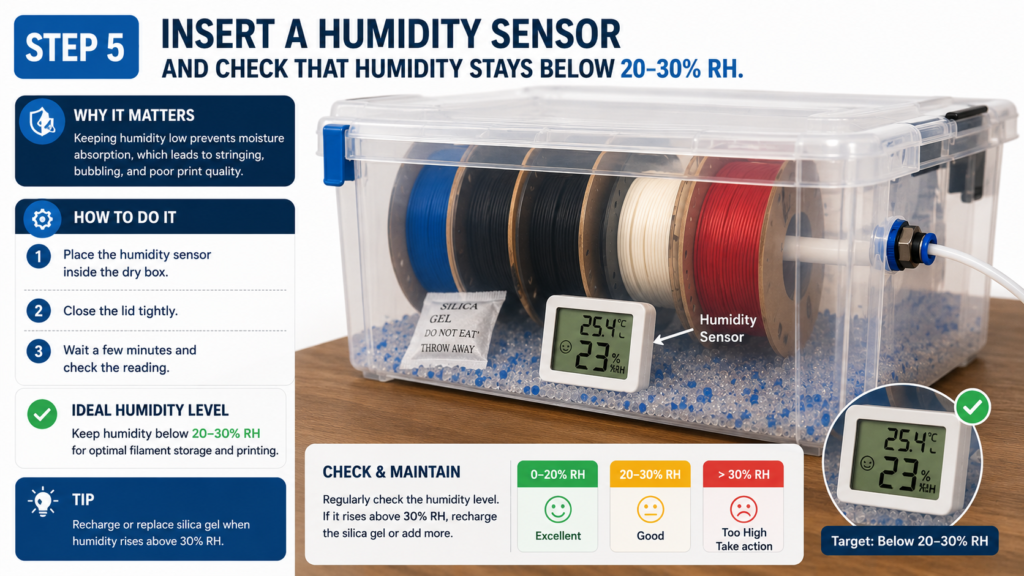
Insert a humidity sensor and check that humidity stays below 20–30% RH.
Should You Add Heat?
Most dry boxes don’t require heating.
If your filament is already wet, dry it first using:
- Filament dryer
- Food dehydrator
- Oven (carefully)
Then move it into the dry box.
Best DIY Dry Box Ideas
Storage Box Dry Box
✔ Cheapest
✔ Easy to build
✔ Multiple spools
Cereal Container Dry Box
✔ Perfect for one spool
✔ Compact
✔ Excellent for PLA
Heated Food Dehydrator
✔ Can dry and print simultaneously
✔ Ideal for Nylon and TPU
Fully 3D Printed Dry Box
✔ Highly customizable
✔ Great DIY project
Commercial Alternatives
If you don’t want to build your own, several commercial solutions are available.
Popular options include:
- PolyMaker PolyBox II
- PrintDry Vacuum Container
- SUNLU Dry Box
- Creality Space Pi
- eSUN eBOX
These offer convenience but are generally more expensive than DIY solutions.
Tips for Better Filament Storage
- Keep humidity below 20–30%
- Replace silica gel regularly
- Store filament immediately after printing
- Avoid leaving spools exposed overnight
- Label dried spools with the drying date
Final Thoughts
A DIY filament dry box is one of the most cost-effective upgrades for any 3D printing setup. Whether you print with PLA occasionally or rely on moisture-sensitive materials like Nylon and TPU, proper storage will improve print quality, reduce failed prints, and extend the life of your filament.
With just a small investment and a few simple tools, you can build a reliable dry storage solution that performs nearly as well as many commercial products.