The nozzle is one of the smallest components of an FDM 3D printer, yet it has one of the biggest impacts on print quality. Every layer of filament passes through this tiny opening, so even a small amount of dirt, burnt plastic, or debris can lead to serious printing problems.
A dirty or partially clogged nozzle may cause under-extrusion, rough surfaces, missing layers, stringing, or even complete print failures. Fortunately, most nozzle problems can be fixed with simple cleaning methods and regular maintenance.
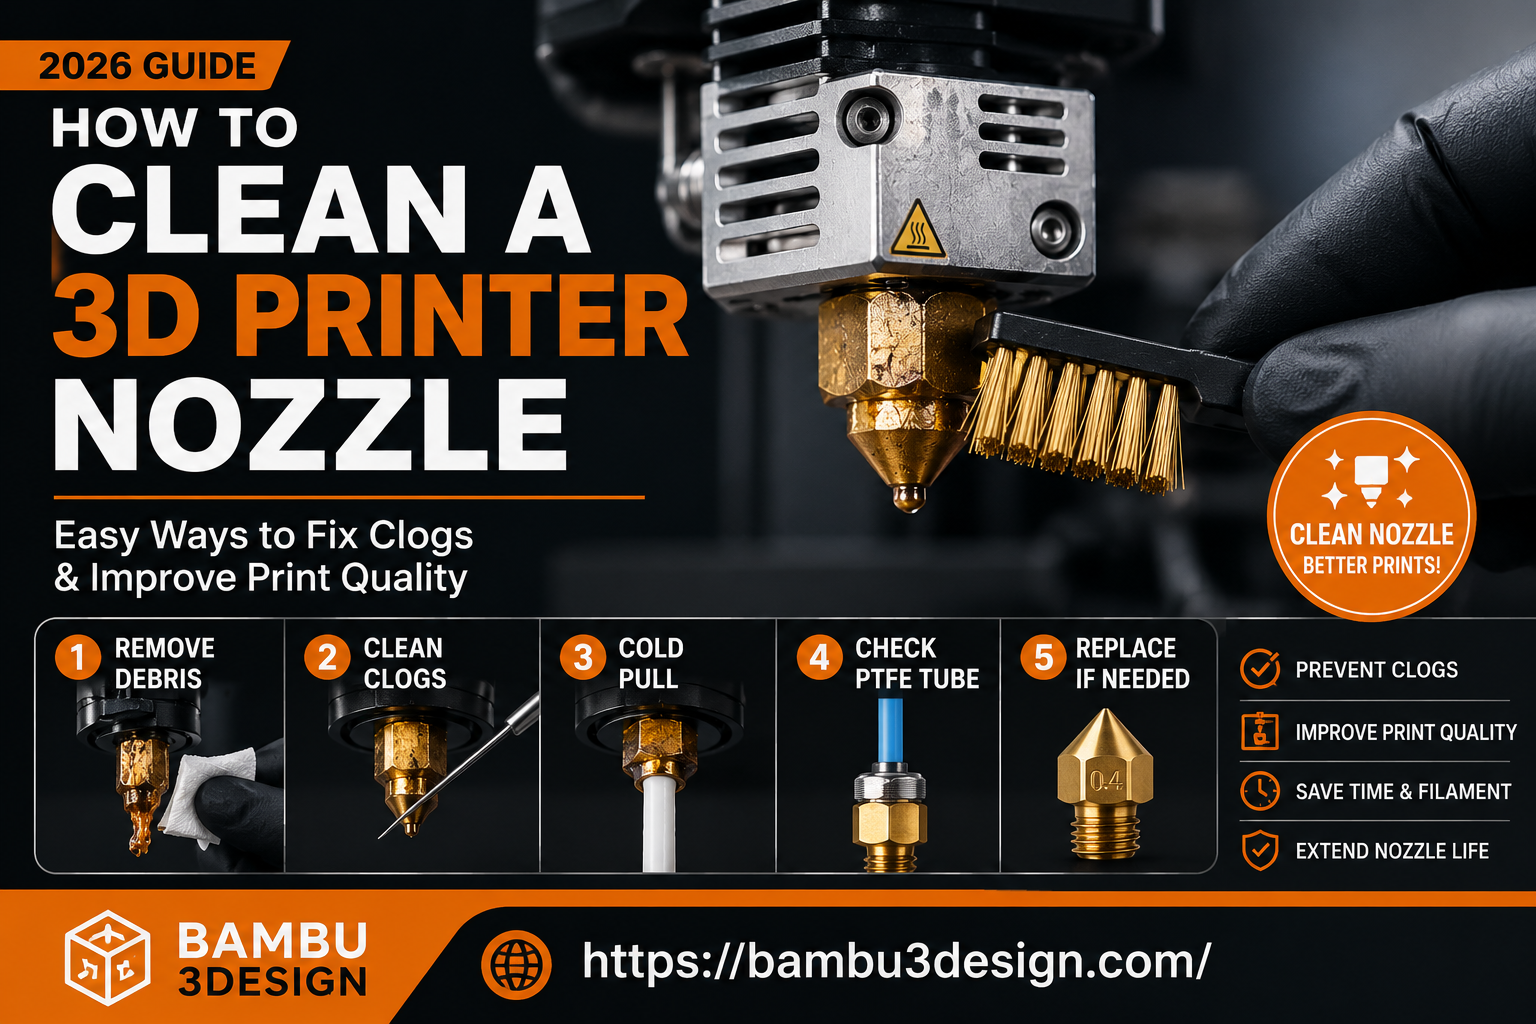
In this guide, you’ll learn how to identify nozzle issues, clean your nozzle safely, remove stubborn clogs, and choose the best replacement nozzle for your printing needs.
Why Is a Clean Nozzle Important?

The nozzle controls how molten filament exits the hot end. When it becomes dirty or clogged, the filament flow is restricted, preventing the printer from extruding material consistently.
Keeping the nozzle clean helps:
- Improve print quality
- Reduce print failures
- Prevent under-extrusion
- Extend nozzle lifespan
- Improve first-layer adhesion
- Maintain accurate extrusion
Regular cleaning only takes a few minutes but can save hours of troubleshooting.
Signs Your Nozzle Needs Cleaning
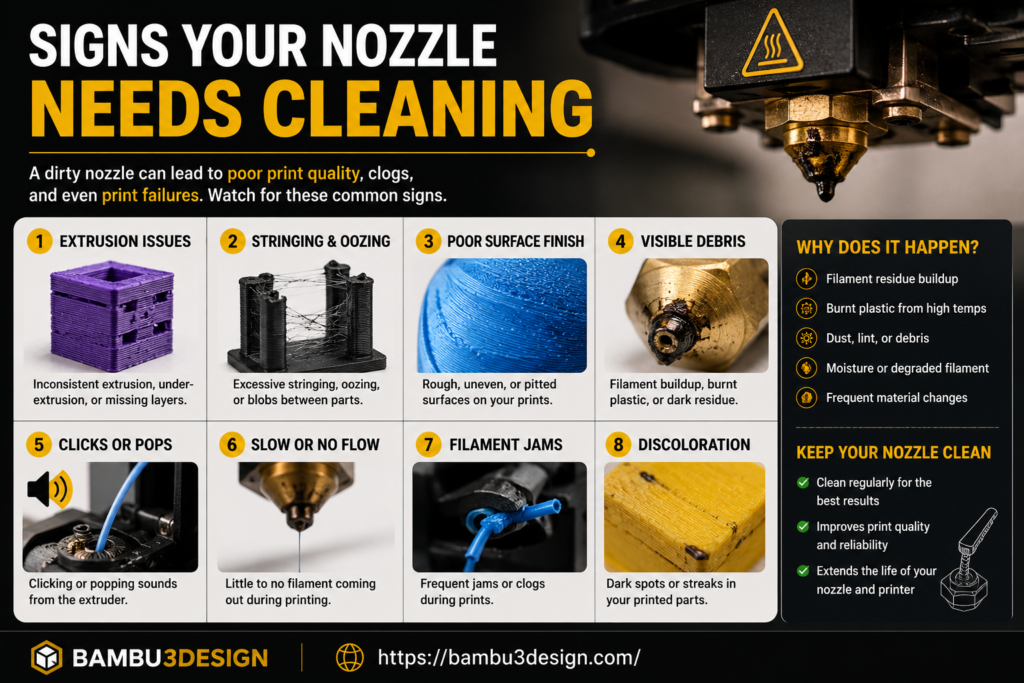
Before replacing your nozzle, check for these common symptoms:
1. Under-Extrusion
If your printer produces thin walls or gaps between layers, the nozzle may be partially blocked.
2. Filament Stops Extruding
When little or no filament comes out despite the extruder motor turning, a full clog is often the cause.
3. Stringing and Blobs
Burnt plastic inside the nozzle can disrupt material flow, causing excessive stringing or blobs on the print.
4. Rough Surface Finish
Dirty nozzles often produce inconsistent extrusion that leaves rough or uneven surfaces.
5. Clicking Extruder
If the extruder clicks while printing, pressure may be building because filament cannot pass through the nozzle efficiently.
Method 1: Clean the Outside of the Nozzle
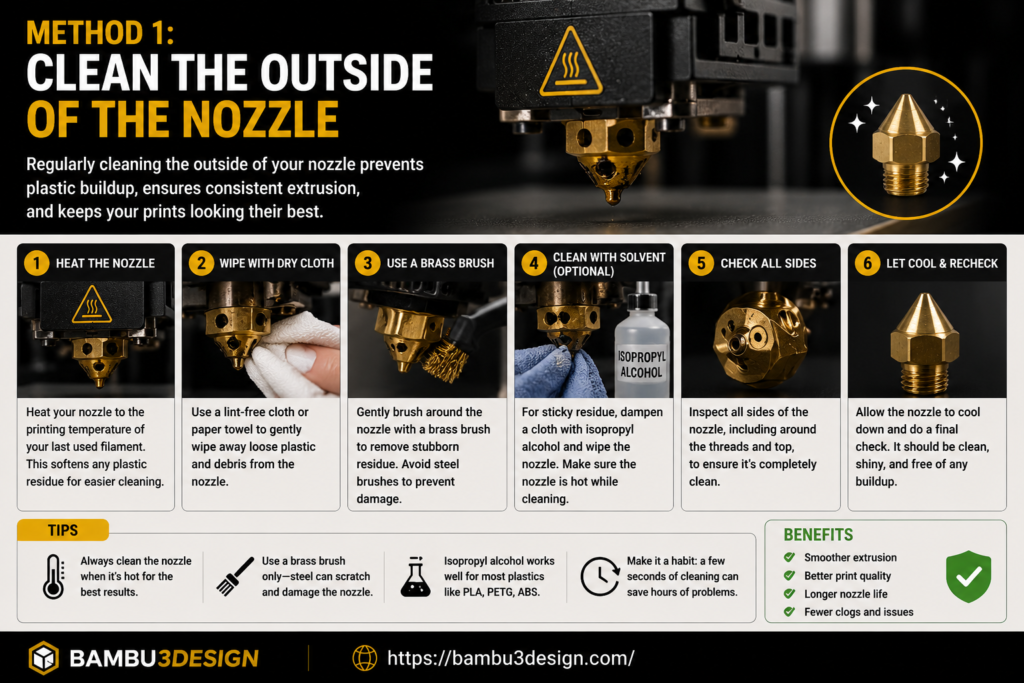
The easiest maintenance task is removing burnt plastic from the outside of the nozzle.
You’ll Need
- Brass wire brush
- Paper towel
- Tweezers
- Isopropyl alcohol
Steps
- Heat the nozzle to your printing temperature.
- Carefully wipe away softened filament using a paper towel.
- Gently scrub stubborn residue with a brass brush.
- Remove remaining plastic using tweezers if necessary.
⚠️ Always be careful—the nozzle can exceed 200°C.
Method 2: Use a Cleaning Needle
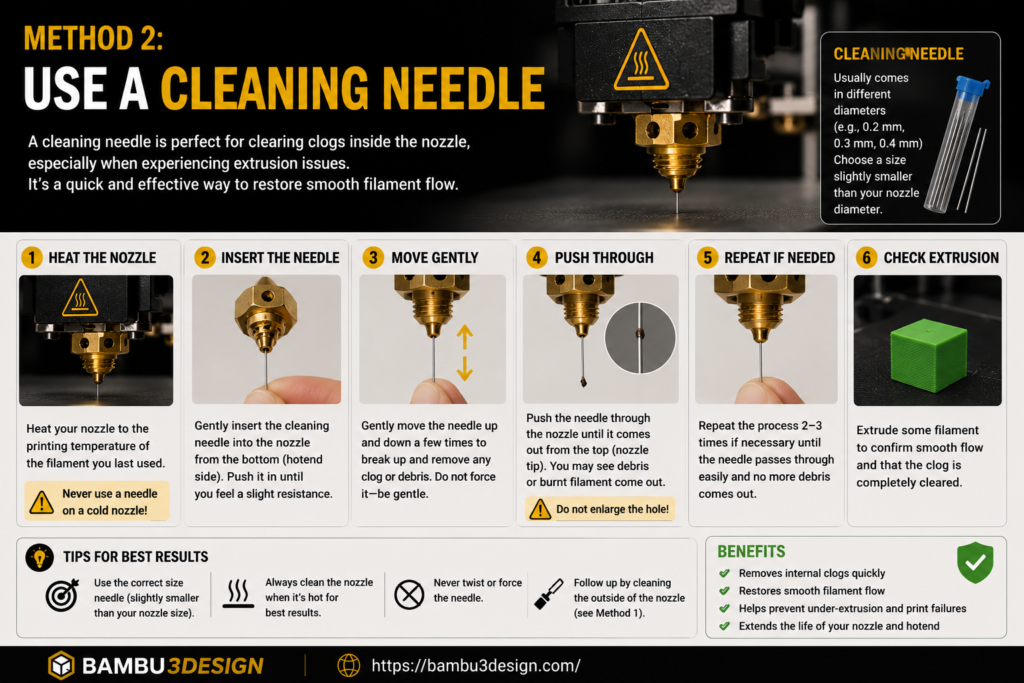
A cleaning needle is one of the quickest ways to remove partial clogs.
Steps
- Heat the nozzle.
- Insert a nozzle cleaning needle through the nozzle opening.
- Move the needle gently up and down.
- Extrude fresh filament until the flow becomes smooth.
This method works well for minor blockages but may not remove larger debris.
Method 3: Perform a Cold Pull
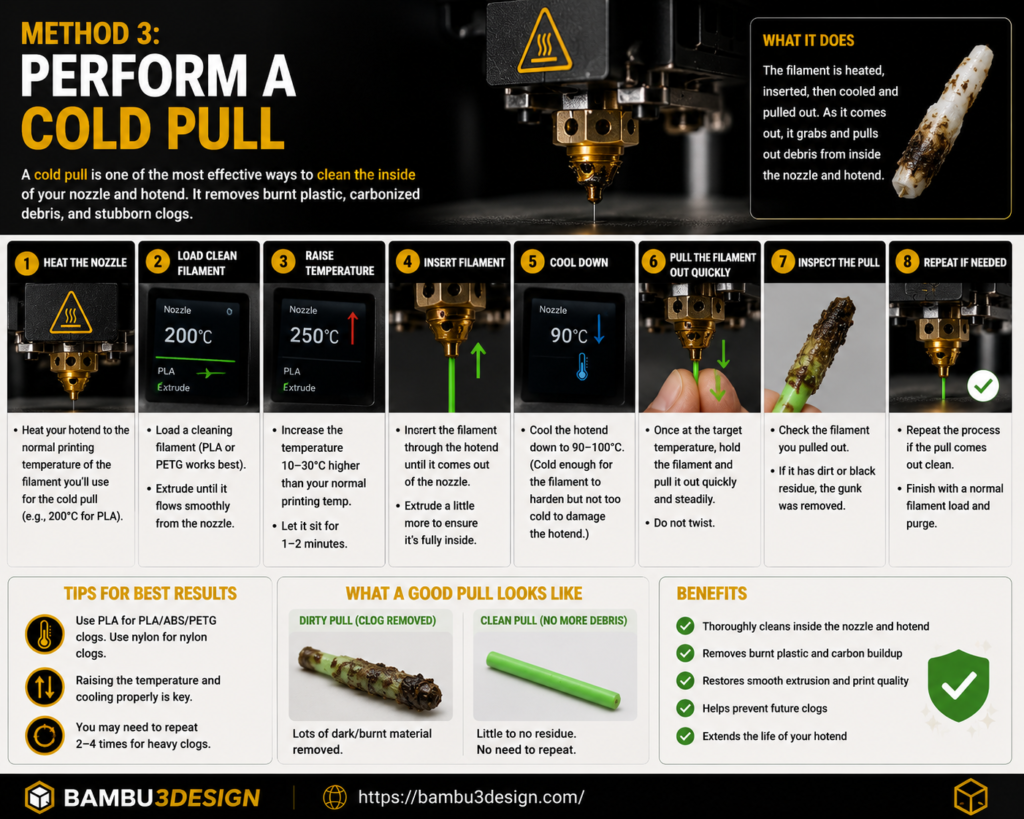
A cold pull is one of the most effective ways to remove burnt filament from inside the hot end.
How It Works
The filament is heated, partially cooled, and then pulled out before it fully hardens.
As it exits, it carries dirt and burnt plastic with it.
Best Filaments for Cold Pulls
- Nylon
- Cleaning filament
- PLA (for light cleaning)
Repeat the process until the removed filament looks clean.
Method 4: Replace the Nozzle
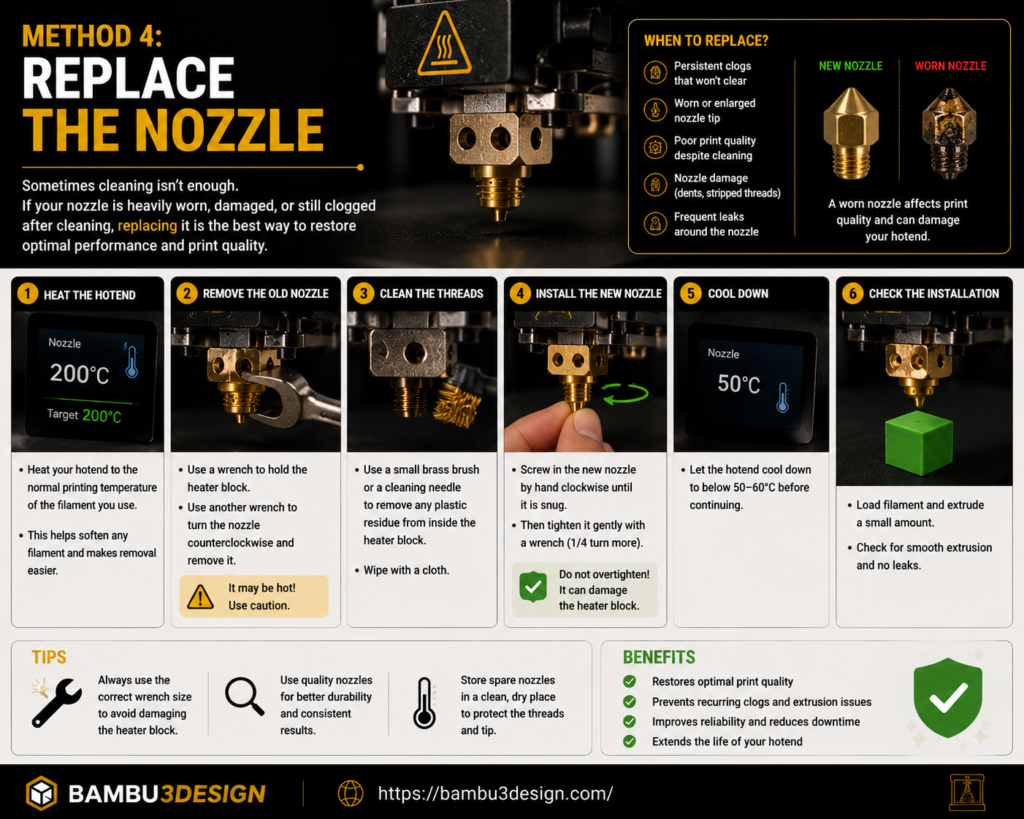
Sometimes cleaning isn’t enough.
Replace the nozzle if:
- The opening has become worn.
- Abrasive materials have enlarged the hole.
- Multiple cleaning attempts fail.
- The nozzle has visible damage.
Fortunately, brass nozzles are inexpensive and easy to replace.
Check the PTFE Tube
Many extrusion problems are caused by a gap between the PTFE tube and the nozzle.
When molten filament enters this gap, it cools and creates a blockage inside the hot end.
If your printer uses a PTFE-lined hot end:
- Remove the tube.
- Trim the end perfectly square.
- Reinstall it firmly against the nozzle.
A proper seal prevents future clogs.
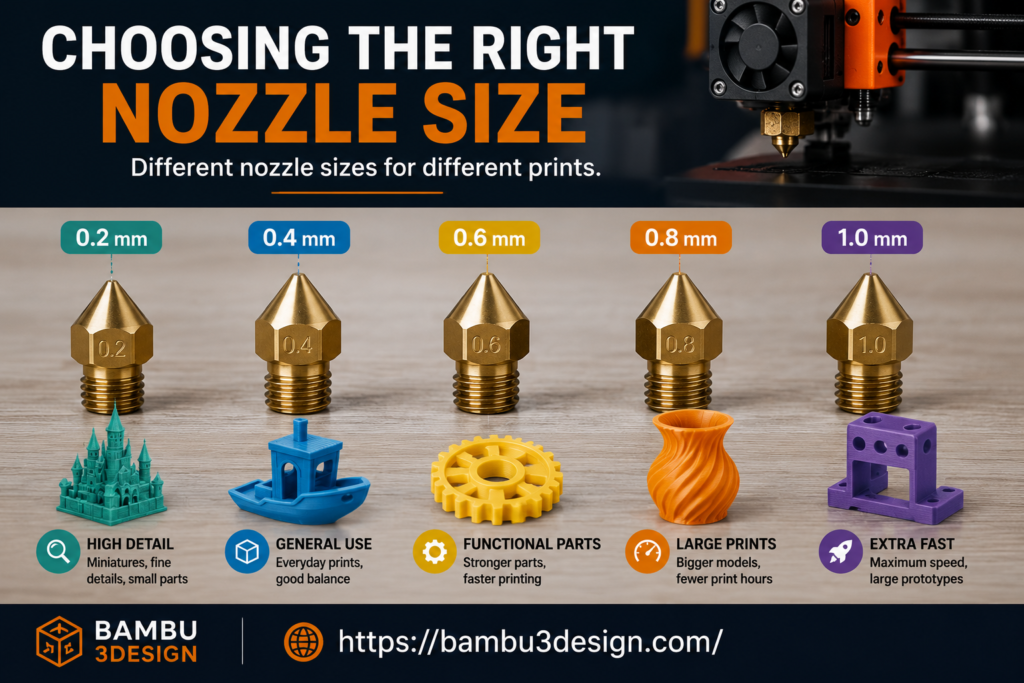
Choosing the Right Nozzle Size
Different nozzle diameters are designed for different applications.
| Nozzle Size | Best For |
|---|---|
| 0.2 mm | Miniatures & fine details |
| 0.4 mm | Everyday printing |
| 0.6 mm | Functional parts |
| 0.8 mm | Large models |
| 1.0 mm | Fast printing |
The 0.4 mm nozzle remains the best all-around choice for most users.
Best Nozzle Materials
Brass
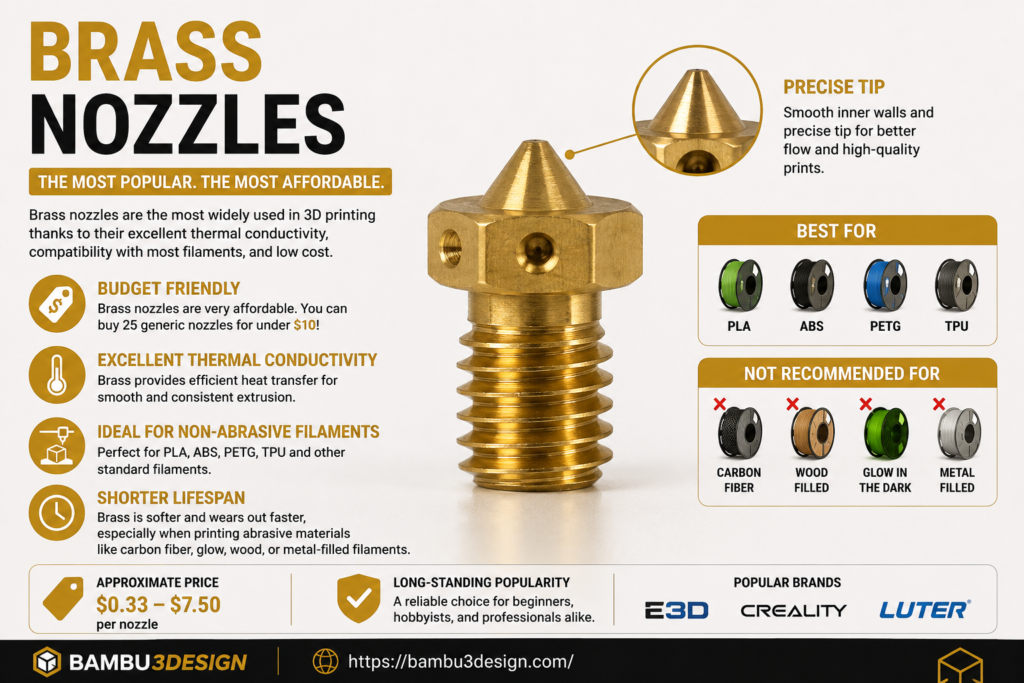
Ideal for:
- PLA
- PETG
- ABS
- TPU
Pros:
- Excellent thermal conductivity
- Low cost
Cons:
- Wears quickly with abrasive filaments
Hardened Steel

Recommended for:
- Carbon fiber
- Glass fiber
- Glow-in-the-dark filament
- Wood-filled filament
Much longer lifespan than brass.
Copper Alloy
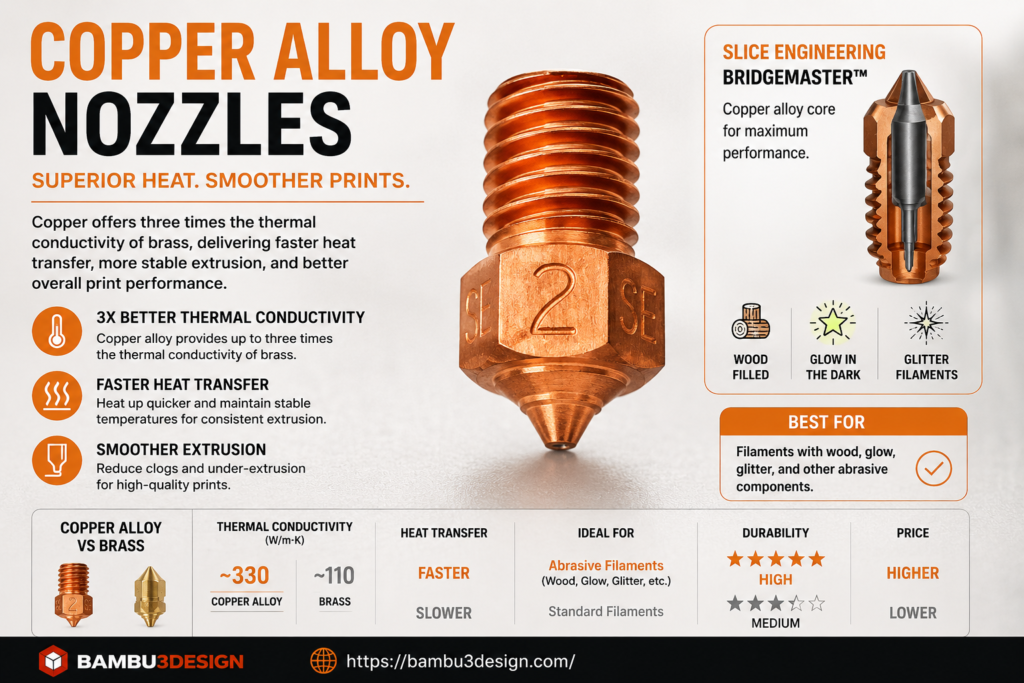
Provides excellent heat transfer and performs well during high-speed printing.
BiMetal
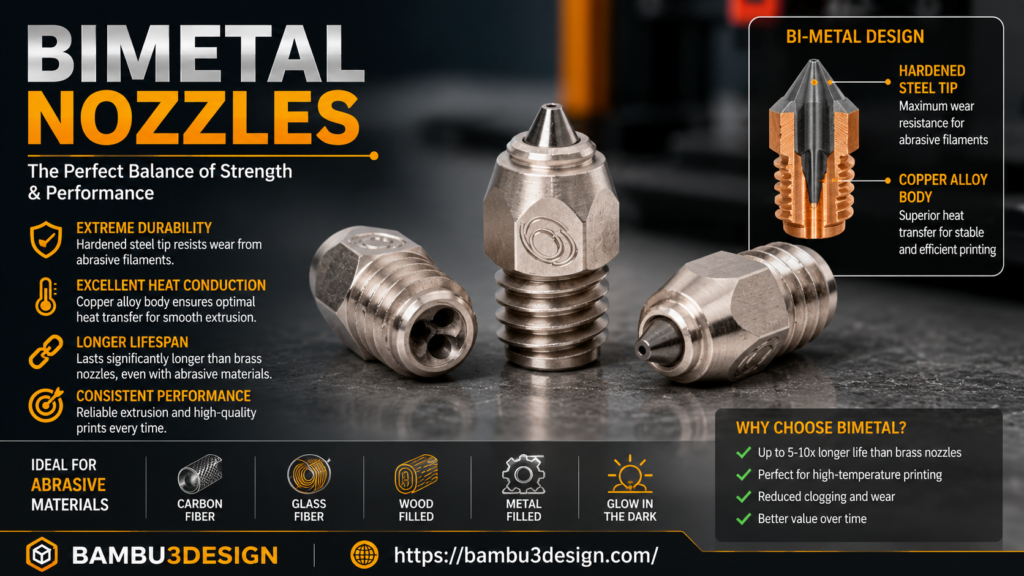
Combines hardened steel with copper for excellent durability and thermal performance.
Suitable for engineering materials.
Ruby-Tipped Nozzles
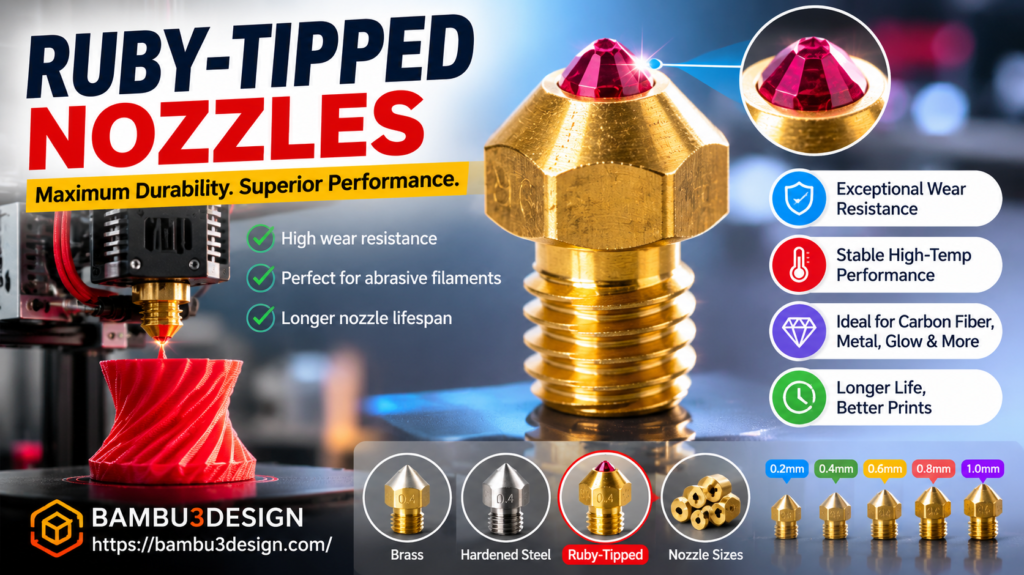
Premium nozzles designed for maximum wear resistance.
Ideal for professional users printing abrasive materials daily.
Tips to Prevent Future Clogs
You can greatly reduce nozzle problems by following a few simple habits:
- Dry filament before printing.
- Use quality filament.
- Print at the recommended temperature.
- Perform regular cold pulls.
- Clean the nozzle after abrasive materials.
- Replace worn nozzles when necessary.
Preventive maintenance is always easier than fixing a failed print.
Final Thoughts
A clean nozzle is essential for consistent, high-quality 3D printing. Whether you’re printing simple PLA models or advanced engineering materials, regular nozzle maintenance can prevent many of the most common printing issues.
By cleaning the nozzle regularly, performing occasional cold pulls, and replacing worn nozzles when needed, you’ll improve print quality, reduce failed prints, and extend the life of your entire hot end assembly.
Happy Printing!